Table of Contents
- Master the Art of Texturizing Spray for Intentional Volume
- Incorporate Statement Hair Accessories to Distract and Tame
- Rock the Half-Up Top Knot to Manage Uneven Layers
- Experiment with the Slicked-Back Wet Look for Polish
- Schedule Regular Micro-Trims to Even Out the Baseline
- Embrace the Messy Middle
- The Grow-Out Edit: Your Curiosities
We all know the thrill of the big chop, but the journey back to length often feels less glamorous.
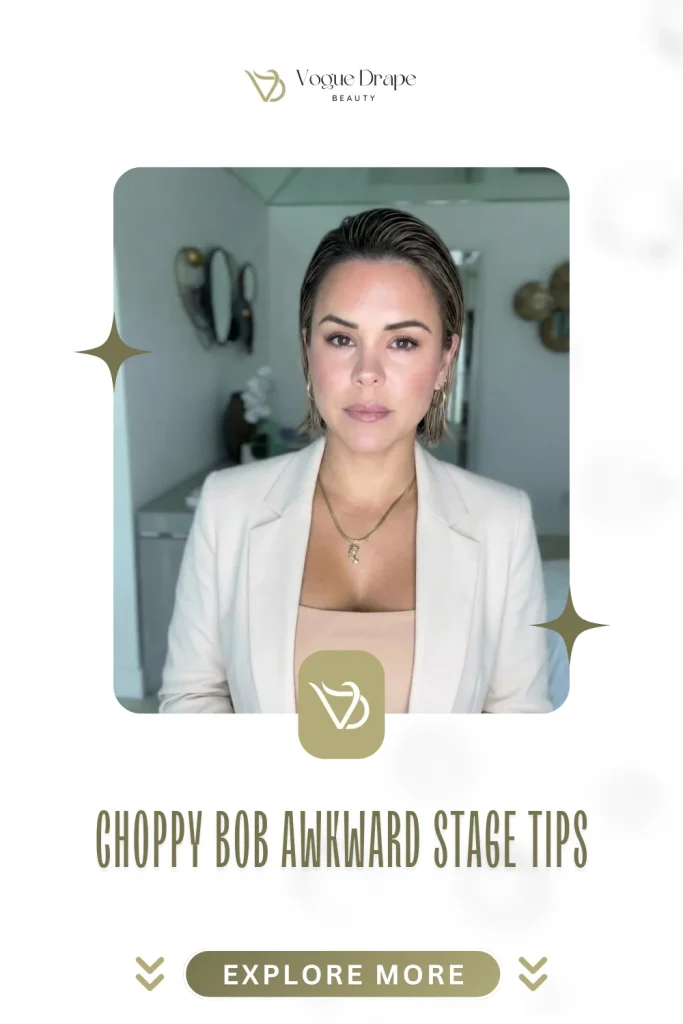
That choppy bob that looked so editorial a few months ago is currently hitting your shoulders in a way that feels impossible to style.
Trust me when I say you are not alone in this transition phase; it is a universal rite of passage for anyone who loves playing with their look.
The secret to mastering this length lies in embracing the texture rather than fighting against it.
This is your moment to experiment with chic accessories, strategic layers, and products that define your unique hair pattern.
Think of this not as a waiting game but as an opportunity to discover new silhouettes that frame your face beautifully.
Get ready to turn those growing pains into serious style gains with tips designed for every hair type.
From maximizing volume to nourishing your ends with cruelty-free favorites, we are breaking down how to navigate this stage with confidence.
Your hair journey is about to get a major upgrade, and the awkward phase is officially cancelled.
The Growth Edit
- Embrace the grit: Texturizing spray is the secret weapon for turning flat, awkward lengths into intentional, airy volume.
- Fake it ’til you make it: Create separation and movement to transform an overgrown cut into an effortlessly chic style choice.
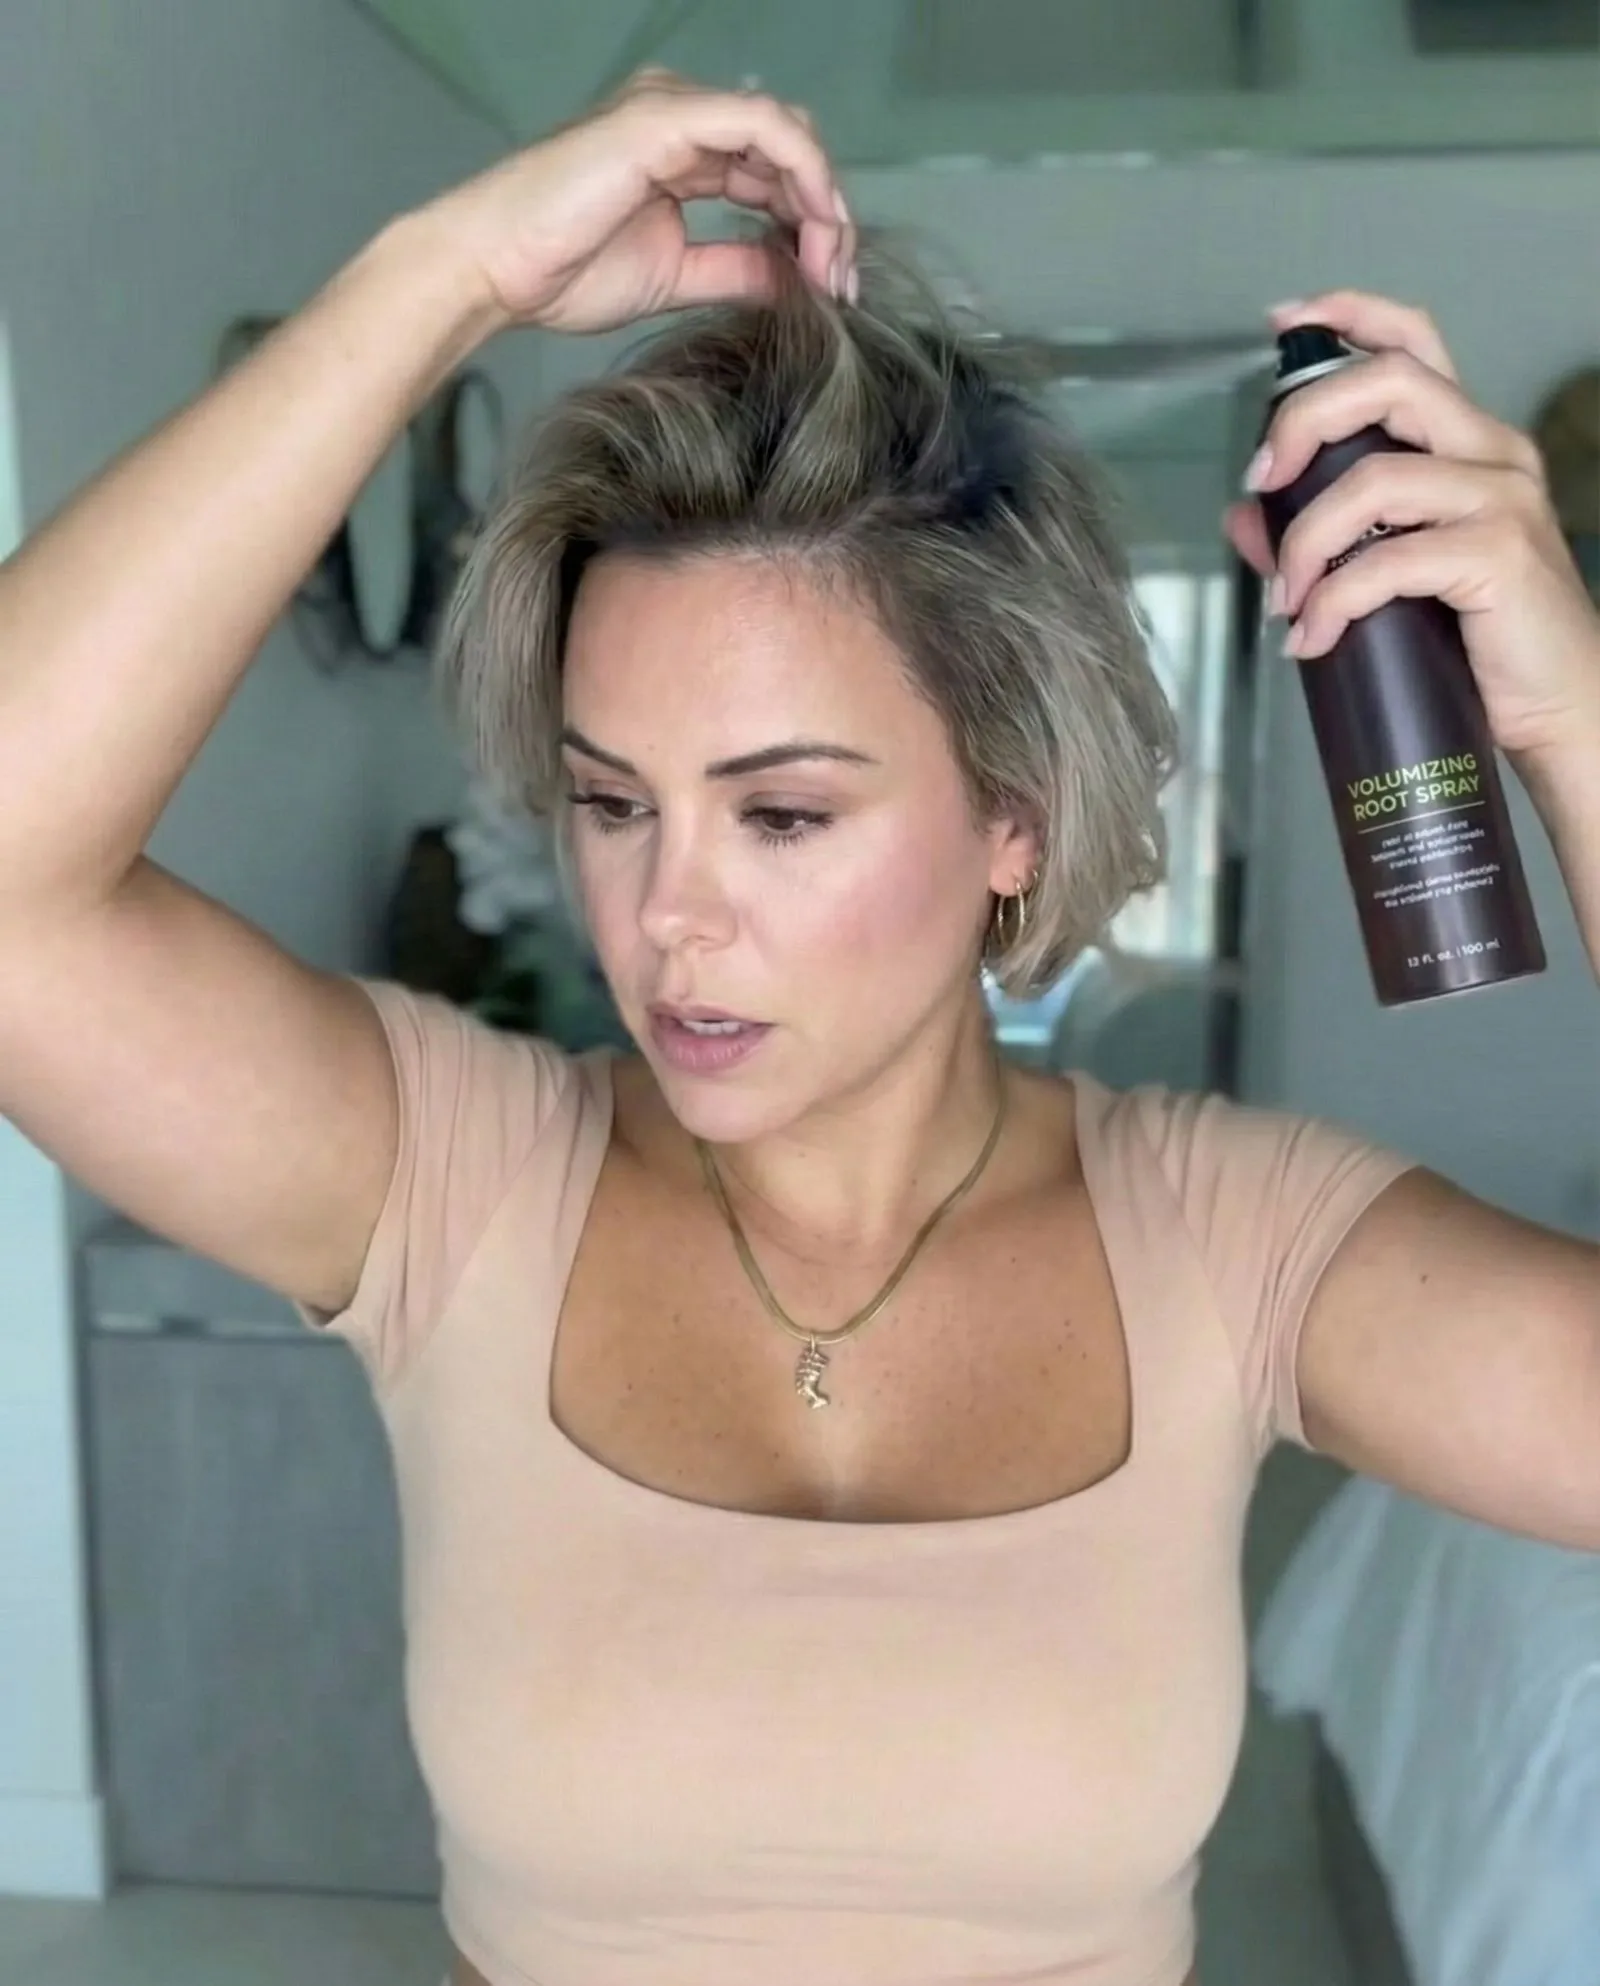
- Application matters: Target mid-lengths and roots, then massage the scalp to build a scaffold of support that defies gravity.
- Choose texture over hold: Opt for the matte, lived-in finish of dry polymers rather than the stiff freeze of traditional hairspray.
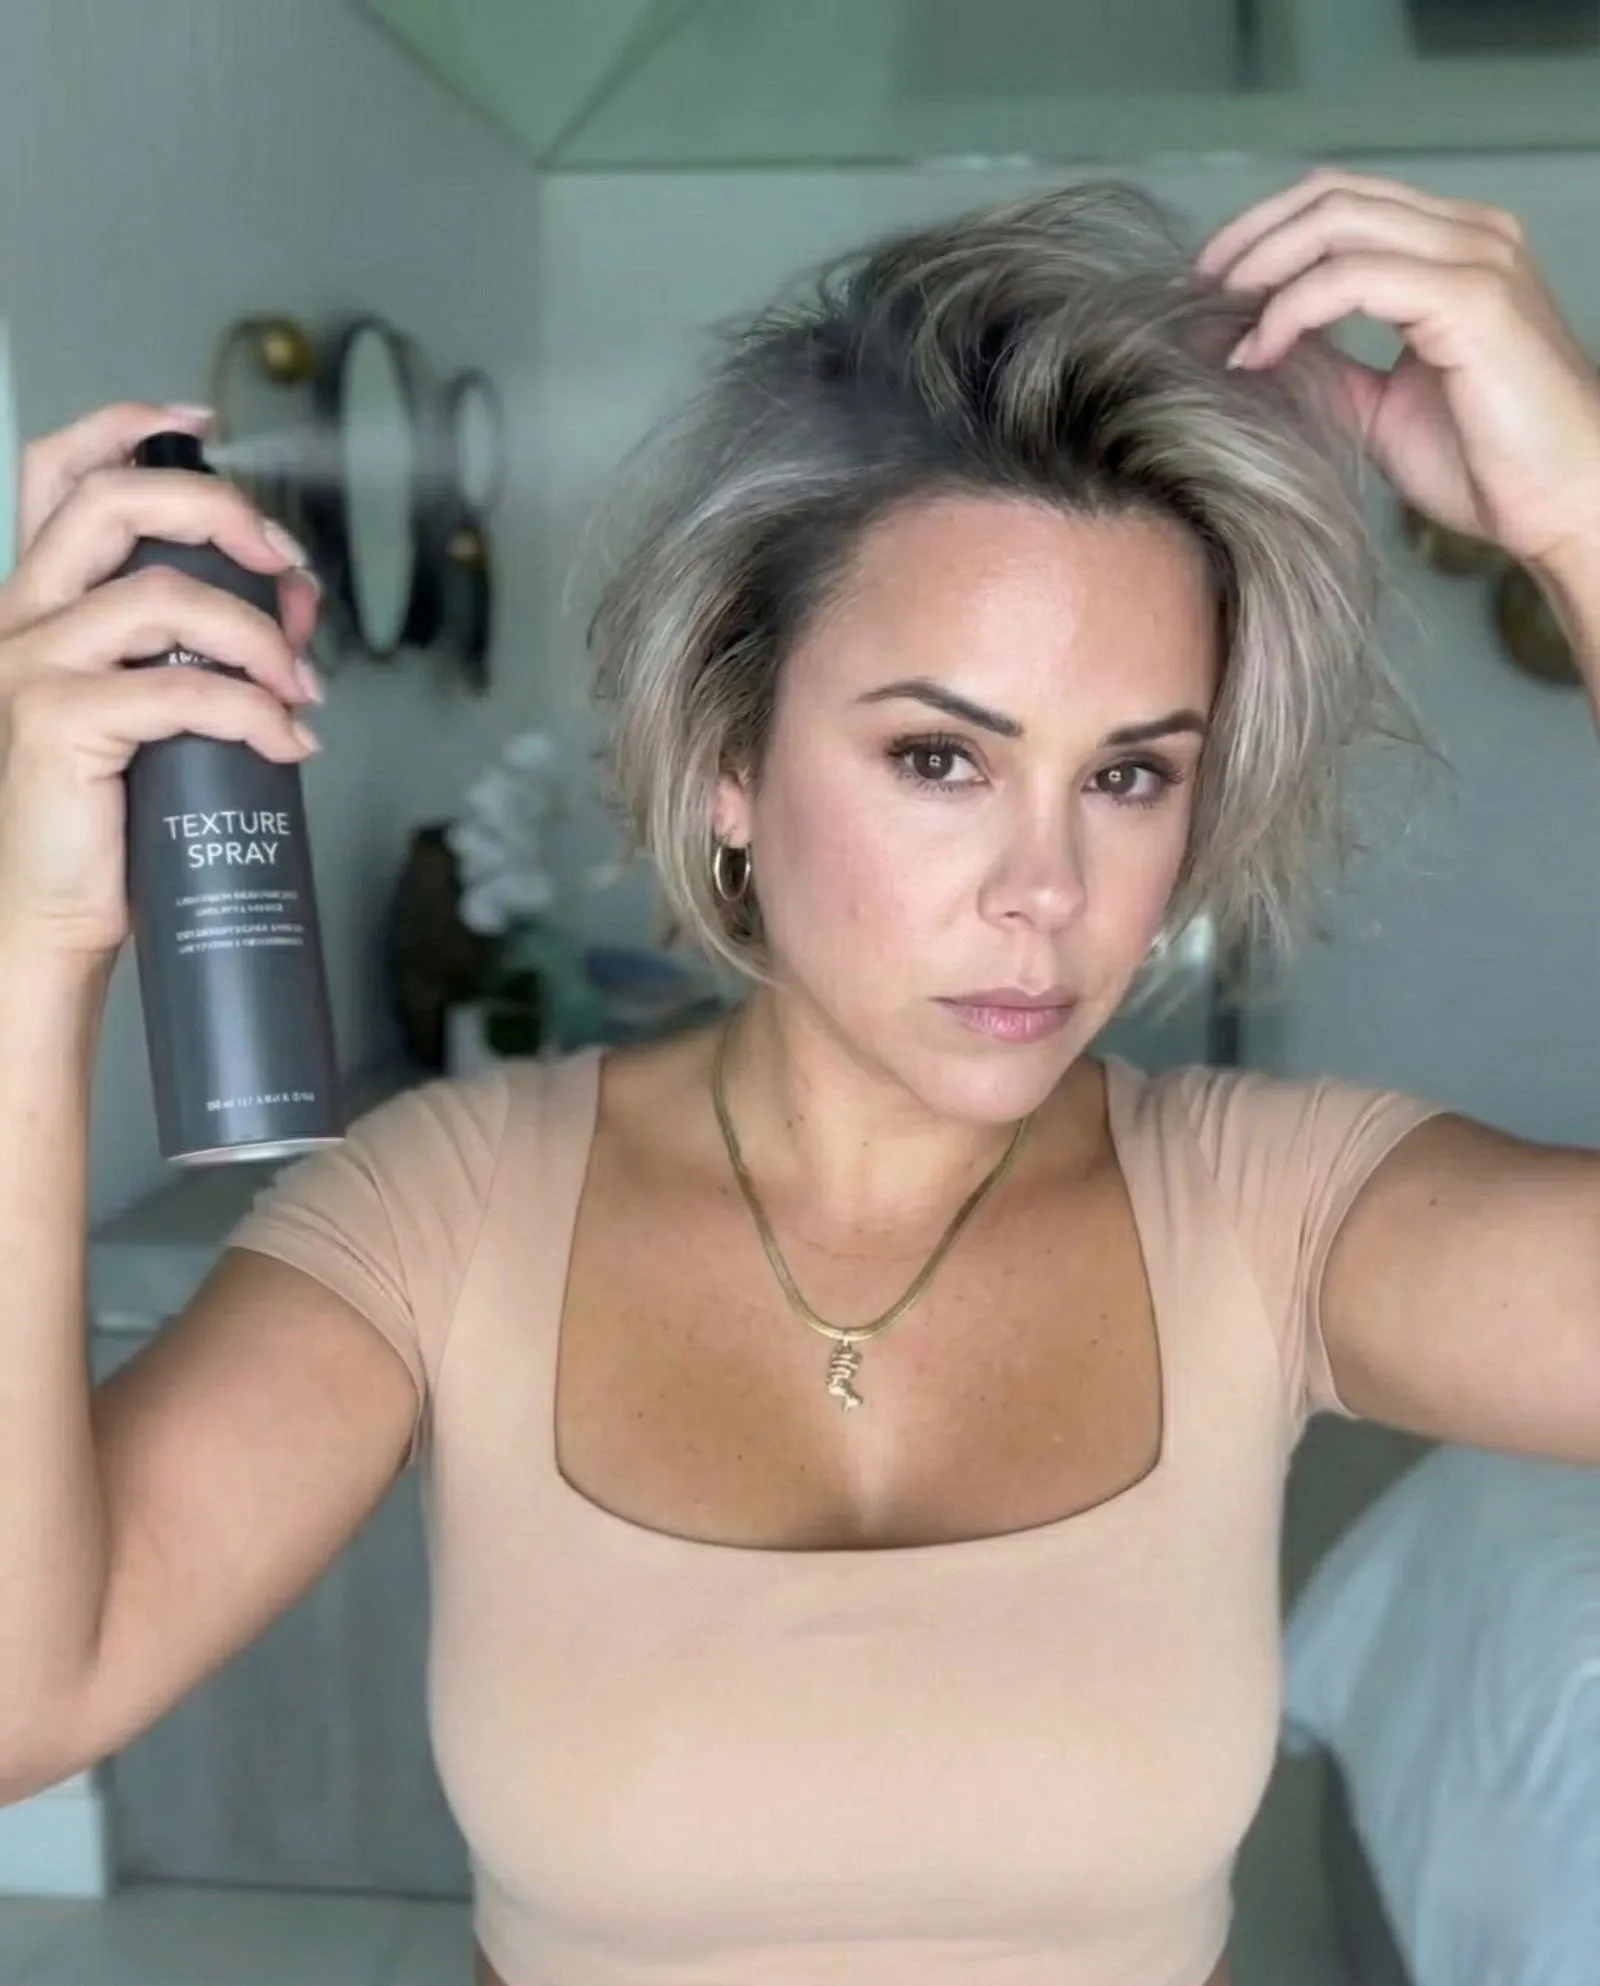
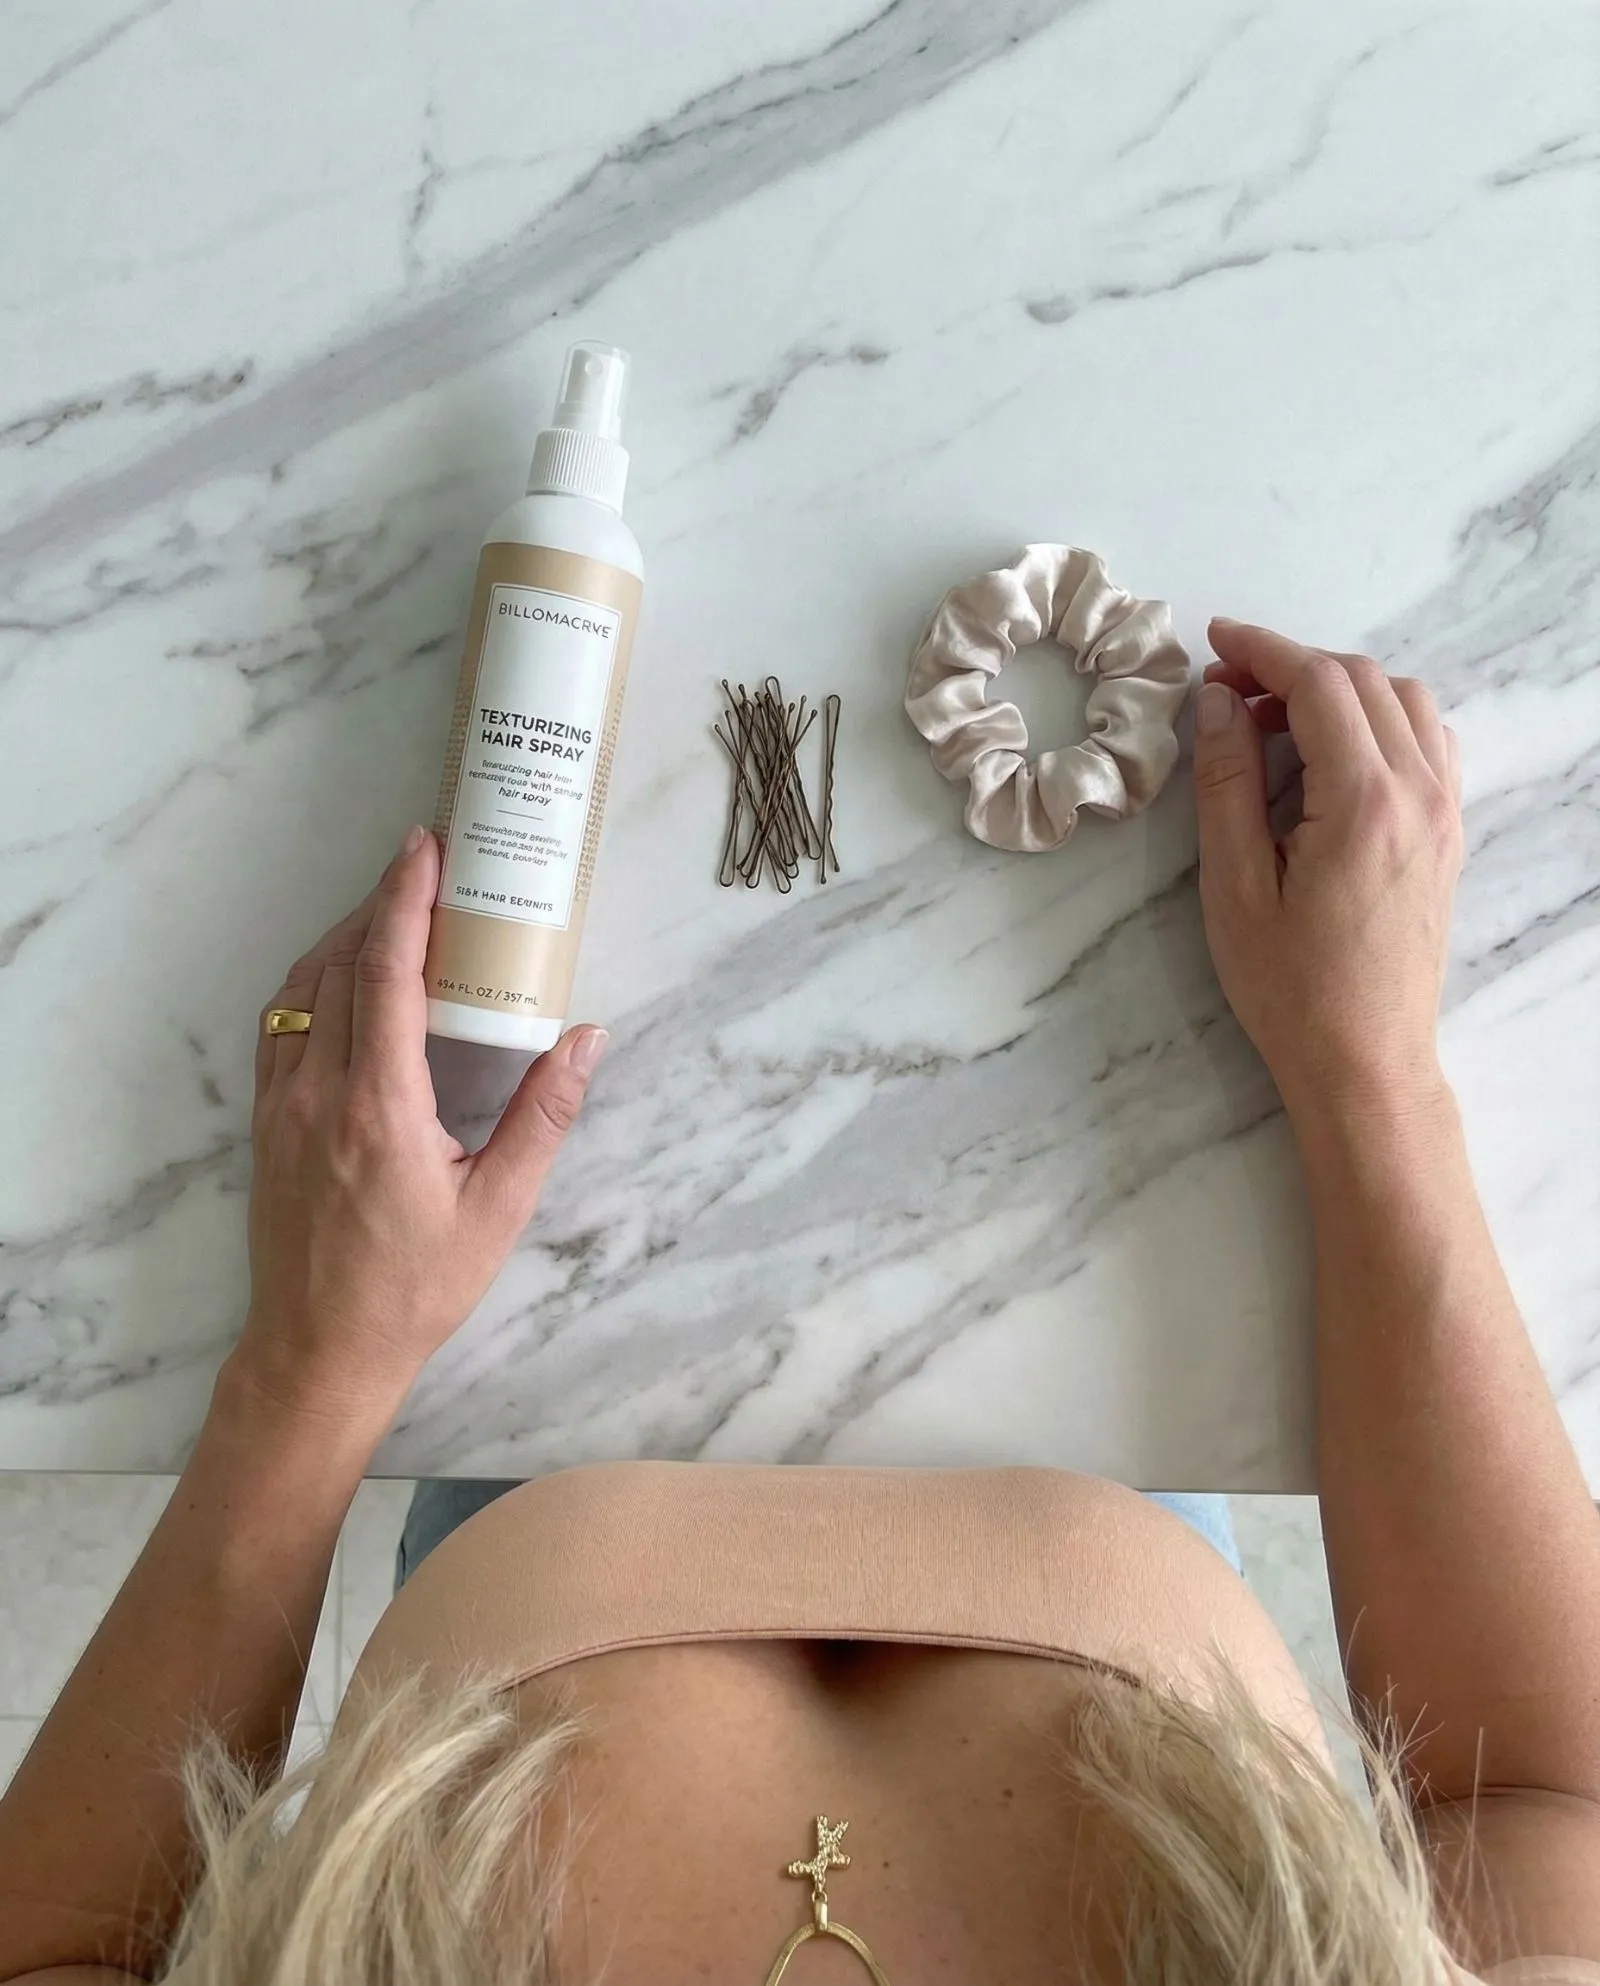
Master the Art of Texturizing Spray for Intentional Volume
The transition from a sharp bob to a longer style often leaves hair looking flat and heavy. The blunt ends that looked chic at chin length can suddenly feel bulky as they graze the shoulders.
Texturizing spray is the secret weapon for this specific phase. Unlike hairspray, which freezes a look in place, texturizing spray adds grit and movement.
It creates an airy, intentional messiness that disguises uneven layers. This product transforms “I haven’t cut my hair in months” into “I meant to look this effortless.”
“In the awkward stage, volume is your best friend. It distracts the eye from the length and focuses it on the vibe.”
The Difference Between Grip and Hold
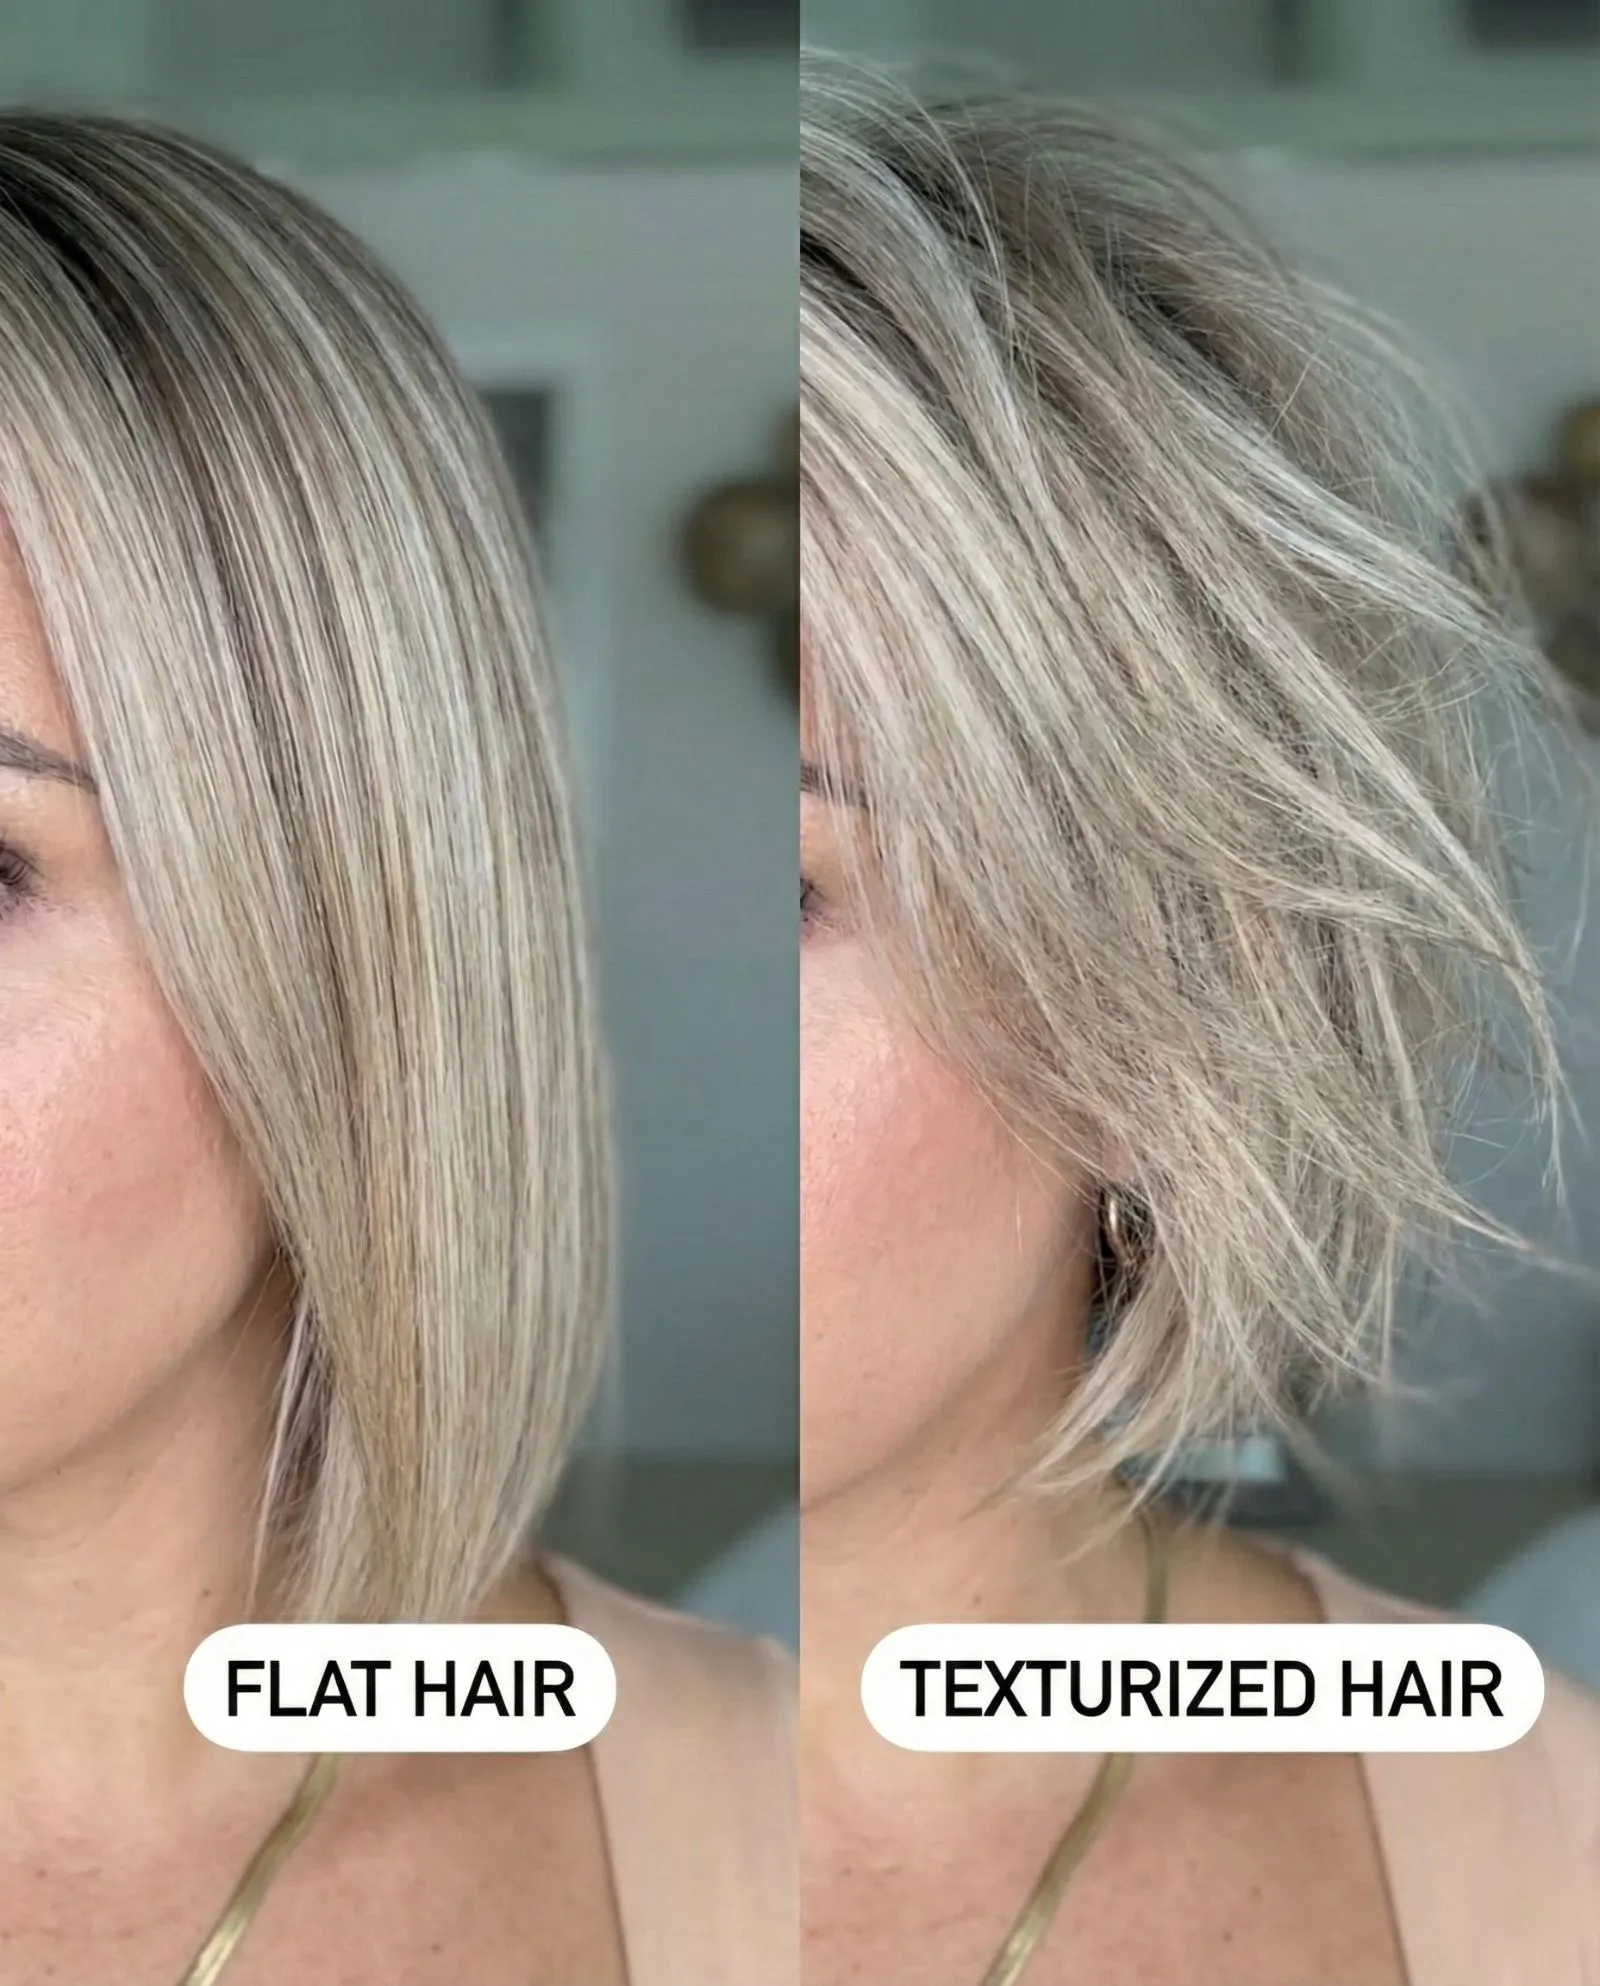
Understanding your products is crucial. While hairspray creates a shell, texturizing spray deposits invisible dry polymers onto the hair shaft.
These polymers push the strands apart, creating friction and instant fullness. This is vital for fine hair types that tend to fall flat against the head shape.
For those with thick or curly textures, this product defines separation without adding weight. It keeps curls from clumping into a single heavy triangle.
You want to create space between the strands. That is what gives you that cool, airy texture. Flip your head upside down and spray into the air, letting the mist fall onto the hair.
Harry Josh, Vogue
Strategic Application for Maximum Lift
To avoid a sticky residue, hold the can at least ten inches away from your head. Focus the nozzle on the mid-lengths and roots rather than the ends.
Lift large sections of hair and spray upwards into the underlayers. This creates a scaffold of volume that supports the heavy top layers of your grown-out cut.
Once applied, use your fingers to vigorously massage the scalp. This action activates the product and disrupts the uniform shape that makes growth phases look awkward.
If you are aiming for stylish hairstyles for medium length hair, mastering this grit now will make the final result even better.
Product Comparison Guide
It is easy to confuse texturizing spray with other finishing products. Knowing which bottle to reach for ensures your style stays matte and modern, not crunchy.
| Feature | Texturizing Spray | Dry Shampoo | Hairspray |
|---|---|---|---|
| Primary Goal | Volume & Separation | Oil Absorption | Hold & Freeze |
| Finish | Matte & Gritty | Powdery & Matte | Shiny or Satin |
| Feel | Lived-in “Grip” | Clean & Dry | Stiff or Sticky |
| Best For | ✅ Undone Waves | ✅ Second-Day Roots | ❌ Updos Only |
Look for ingredients like hydrolyzed wheat protein or zeolite. These absorb excess oil while plumping up the hair cuticle for that coveted French-girl aesthetic.
The Texture Toolkit
- Texturizing spray is the antidote to the flat, heavy look of growing out a bob, adding intentional grit and airy movement.
- Unlike hairspray that freezes a style, this product uses dry polymers to push strands apart for a fuller, matte finish.
- For maximum lift, spray into the underlayers from a distance and vigorously massage the scalp to activate the product.
- Select formulas containing zeolite or hydrolyzed wheat protein to achieve volume and oil absorption without the stiffness.
Incorporate Statement Hair Accessories to Distract and Tame
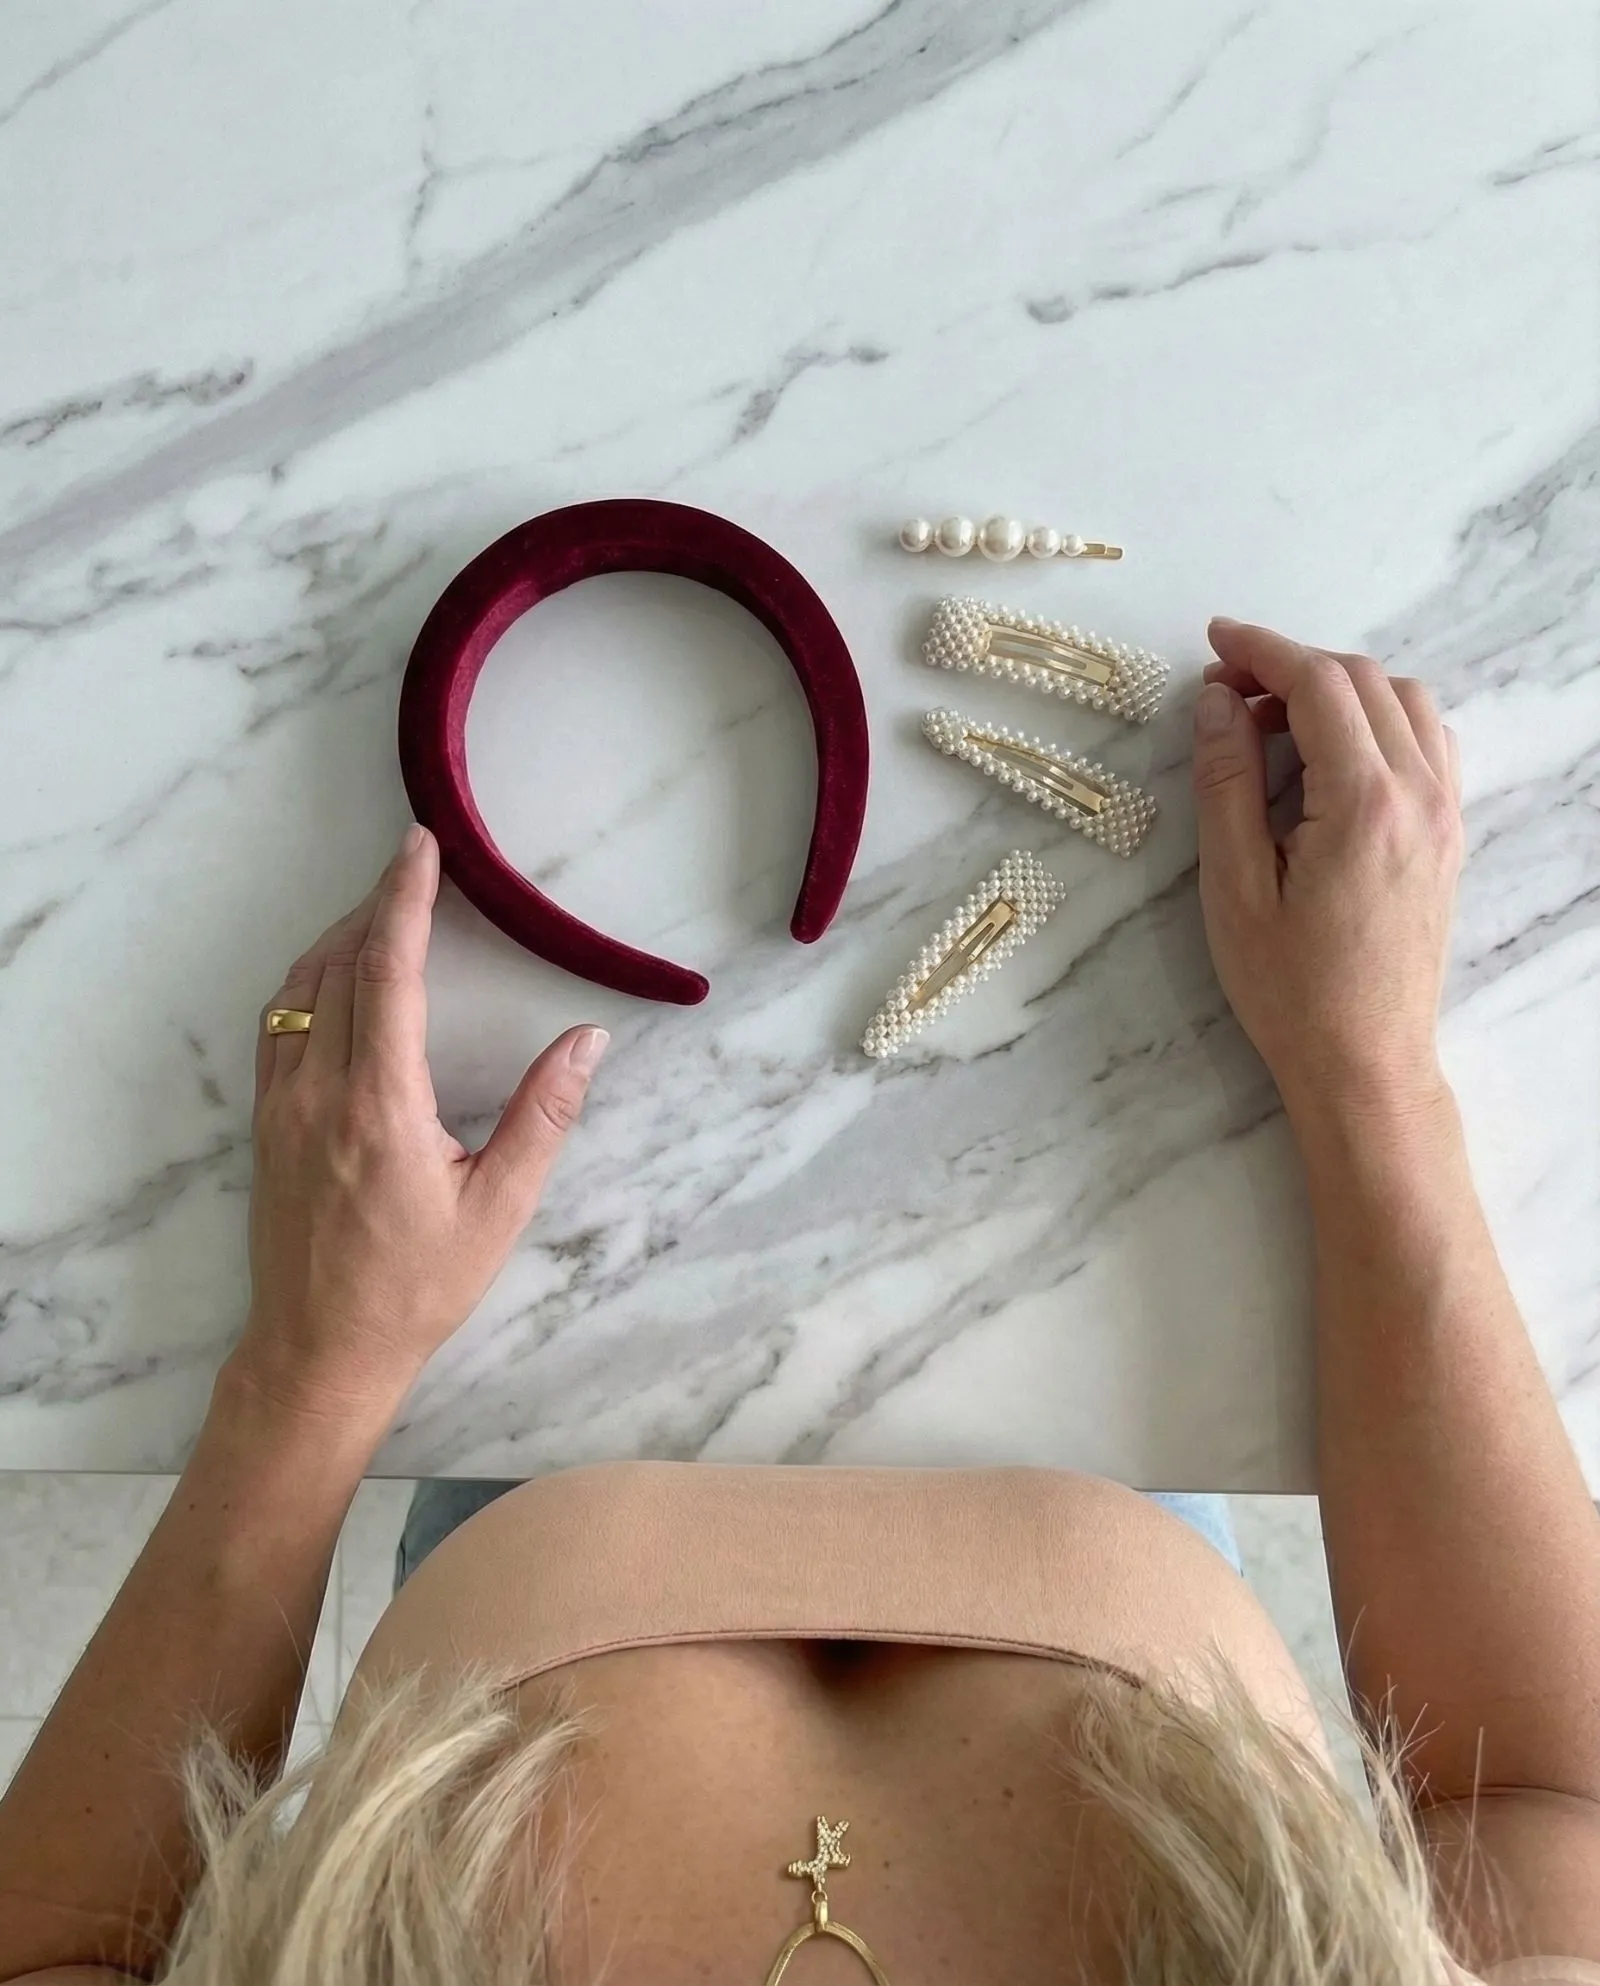
When your layers refuse to behave, accessories become your secret weapon. They serve a dual purpose during this phase: they physically tame unruly strands and visually distract the eye.
By placing a bold focal point near your face, you draw attention away from the uneven lengths at the nape of your neck. This is the time to embrace maximalism with your hair wardrobe.
“Accessories transform an awkward hair day into an intentional style statement.”
The Power of the Padded Headband
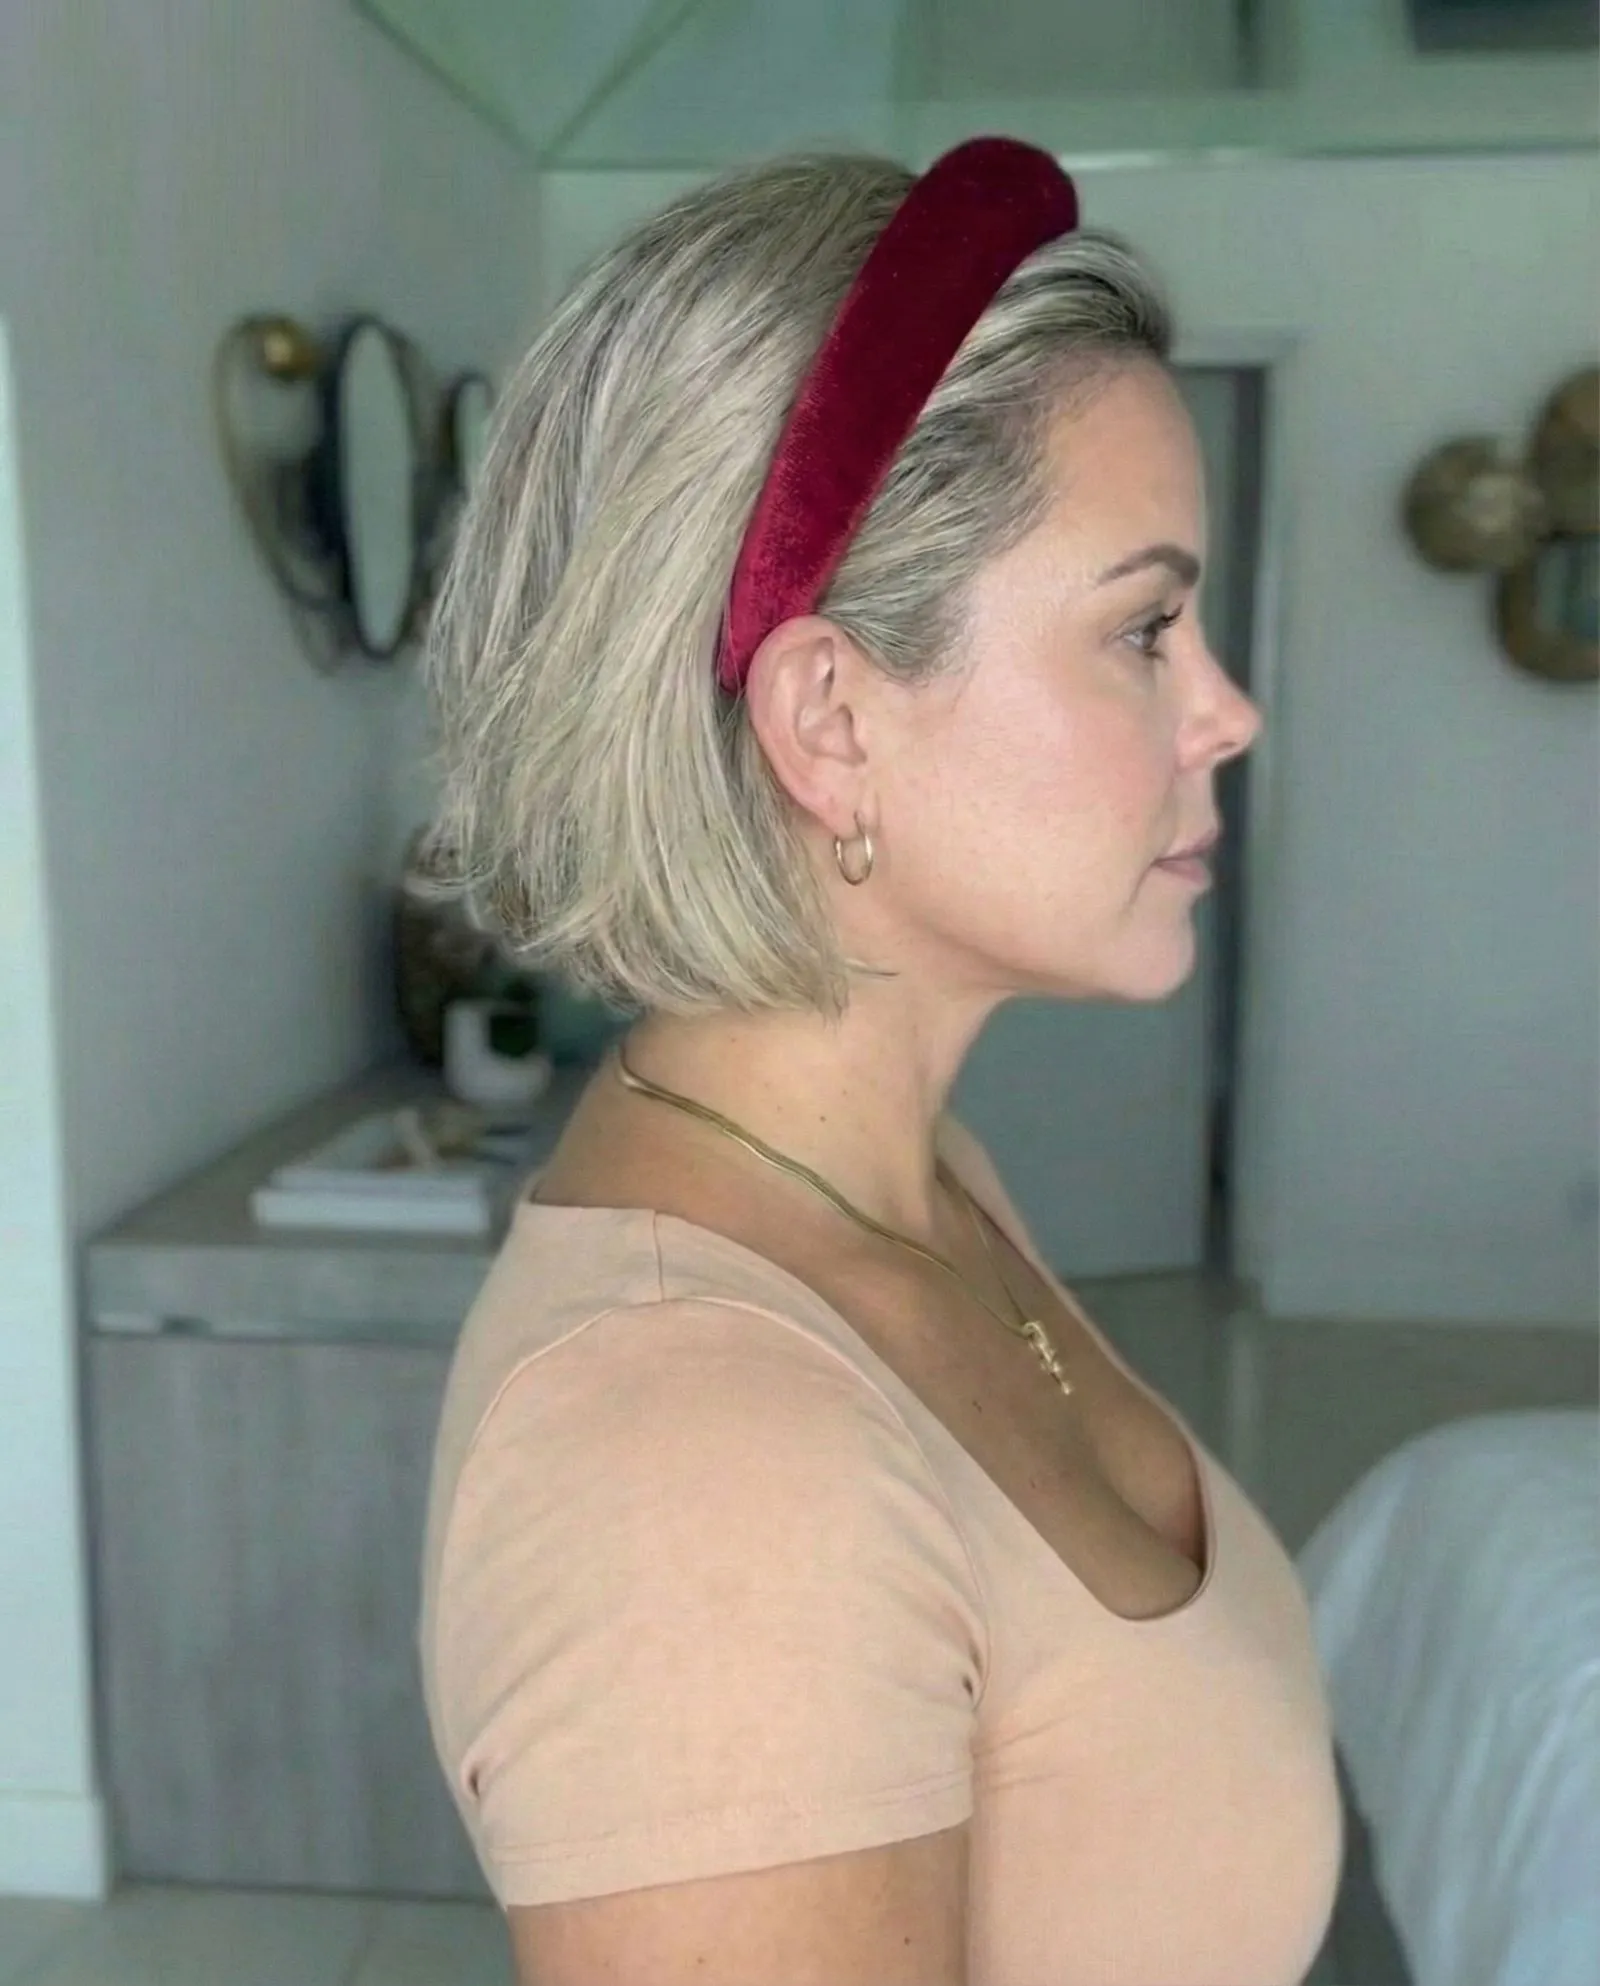
A padded headband is the quickest fix for a choppy bob that feels flat or wide. The height of the accessory balances the volume at the sides of your face. It creates a deliberate silhouette.
Opt for luxurious textures to elevate the look. A crushed velvet band in midnight blue or a satin finish in champagne gold looks expensive and chic. It works for all hair textures.
For those with coily or curly hair, a structured headband pushes volume back. This allows your face to shine while containing the shorter layers that frame the cheeks.
Strategic Pinning with Barrettes
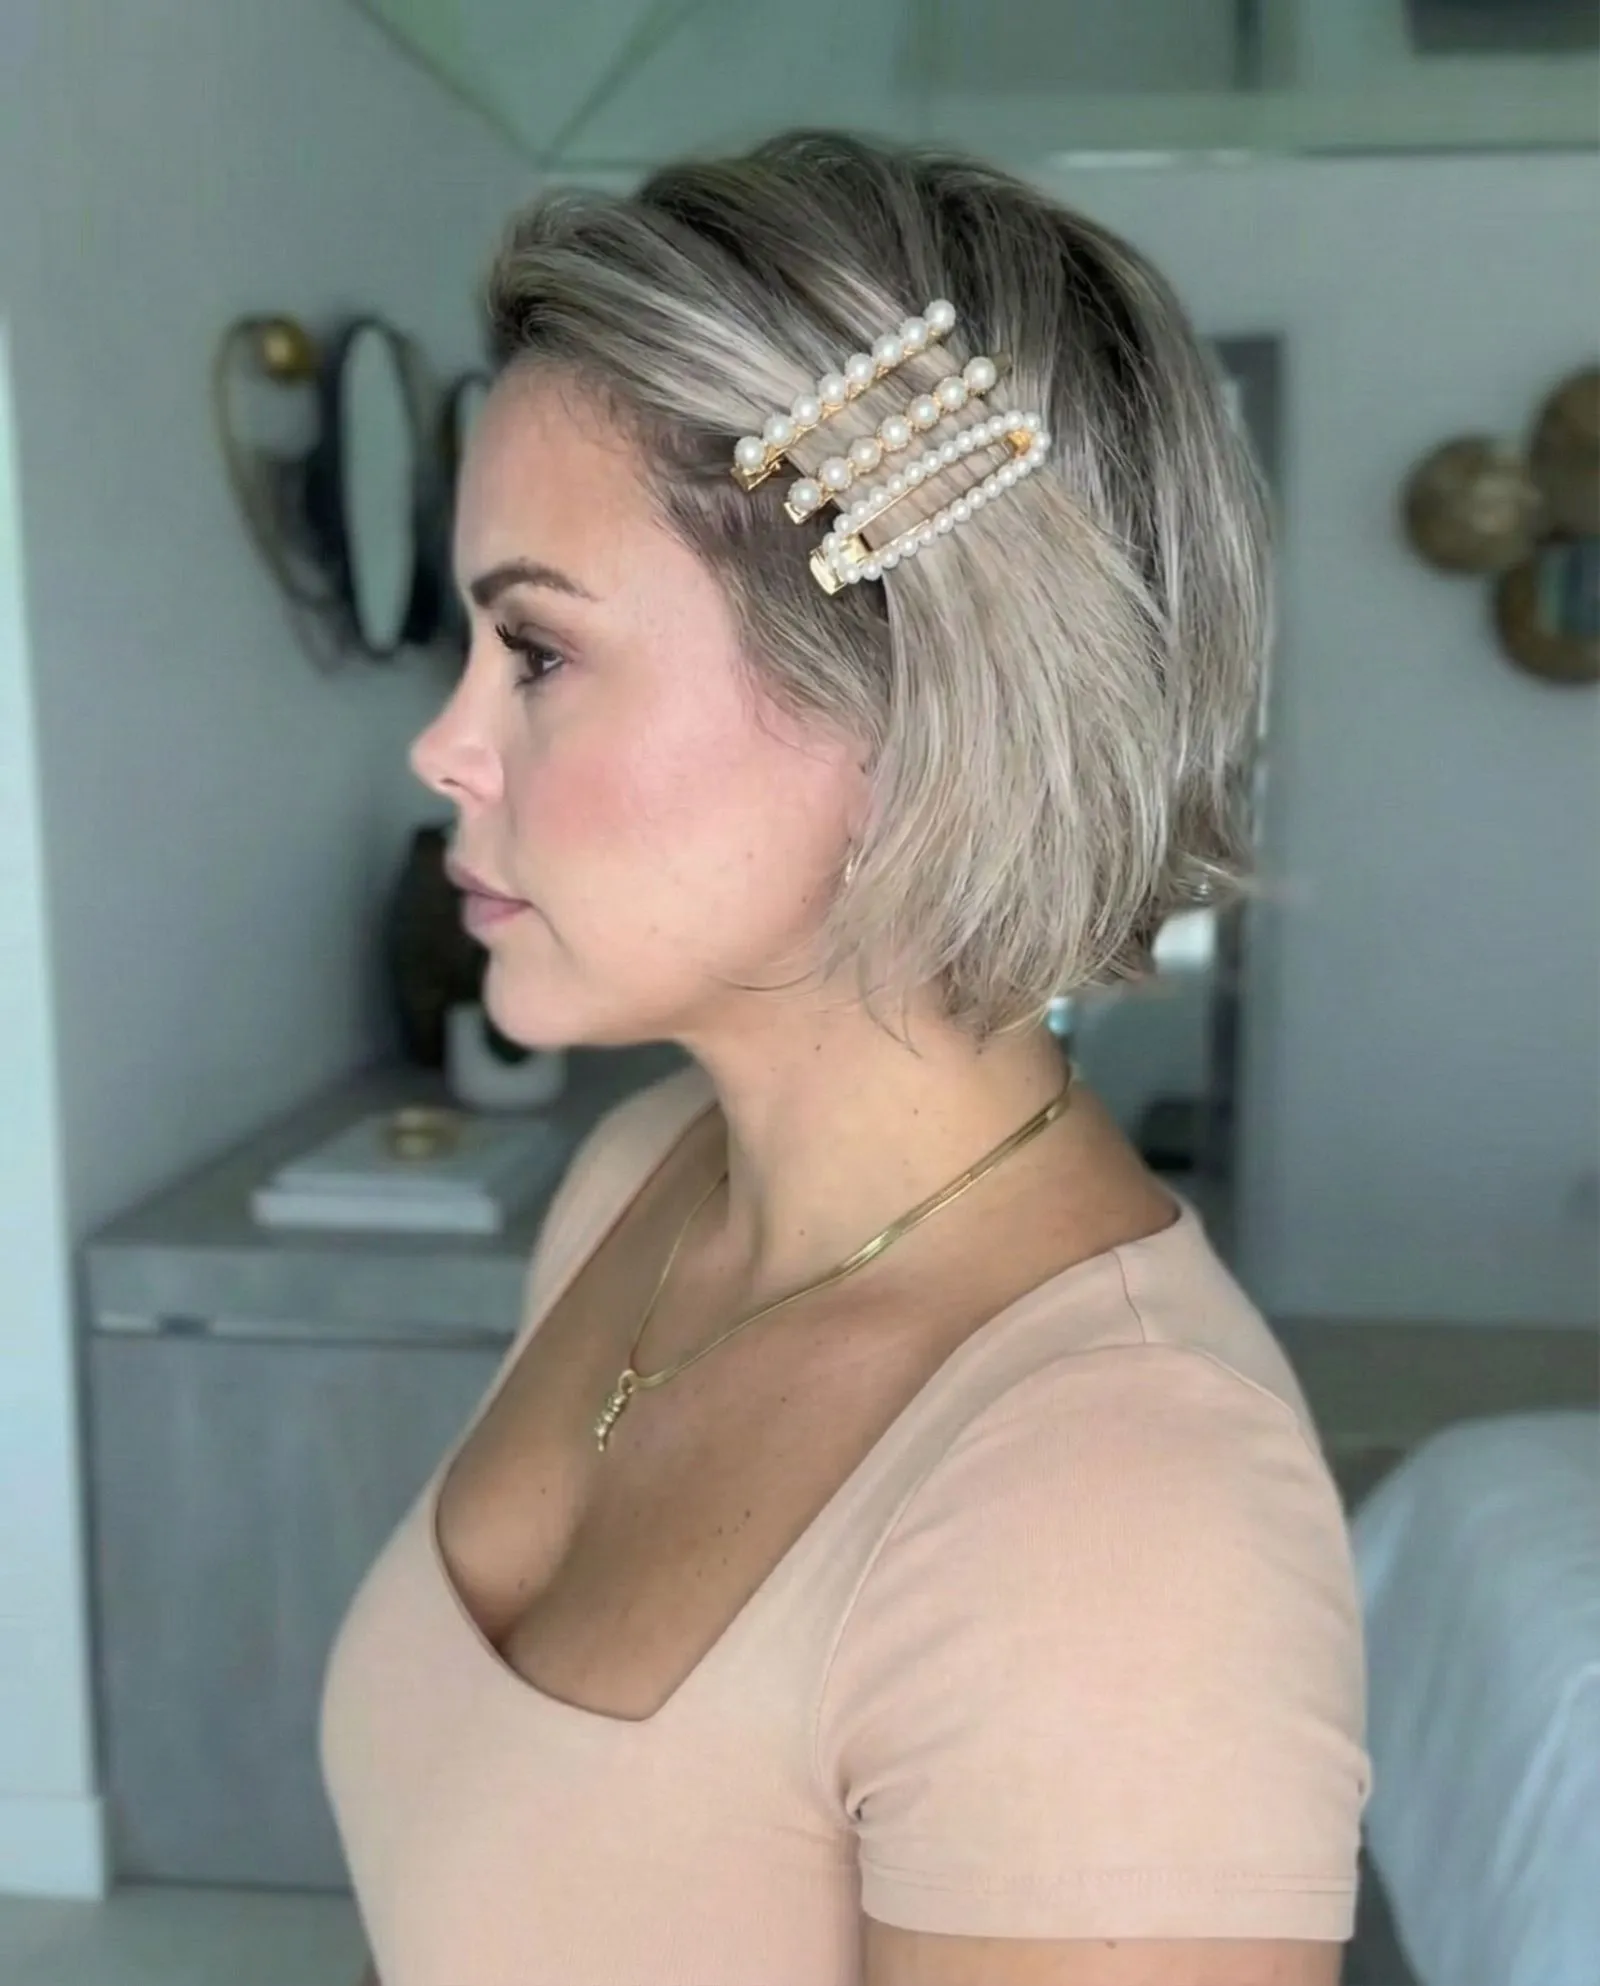
Exposed bobby pins are no longer something to hide. We are seeing a resurgence of stacked clips and architectural slides. Use them to pin back the pieces that are currently too short.
Try the “exposed ear” tuck. Sweep one side of your bob behind your ear and secure it with three distinct clips. Mix metals like brushed gold and silver for a modern aesthetic.
If you need inspiration for arranging these clips, you might look at 15 stylish hairstyles for medium length hair to see how placement changes a look.
Hair accessories are having a major moment… They are the perfect way to distract from a cut that is in-between stages.
Mara Roszak, Vogue
Silk Scarves for the “Mullet” Phase
The back of the hair often grows faster than the front. This can create a tail that feels unkempt. A patterned silk scarf is the chicest way to disguise this uneven growth at the nape.
Fold a square silk scarf into a triangle and tie it bandit-style over your hair. Alternatively, roll it into a strip and tie it as a headband with the knot at the base of your neck.
This adds a bohemian flair while protecting your ends from friction. Look for prints in chartreuse or terra cotta to add a pop of color to neutral outfits.
If you have enough length to weave the scarf into a plait, you can explore 10 winter braid hairstyles for effortless style for technique ideas.
The “Grow-Out” Survival Toolkit
Keep these essentials in your bag to handle any bad hair moment instantly. Having the right tools turns a styling emergency into a fashion opportunity.
- Oversized Snap Clips: Perfect for securing thick sections of hair that fall forward.
- Spiral Bobby Pins: These grip textured hair better than standard pins and hold layers tight.
- Matte Claw Clips: Use a small claw clip to create a half-up style that hides the bottom length.
- Texture Spray: Grit helps accessories stay in place on freshly washed hair.
The Accessory Edit
- Use padded headbands to balance volume and add height, instantly fixing bobs that feel flat or wide.
- Turn short, unruly layers into a focal point by stacking architectural clips or trying an ‘exposed ear’ tuck.
- Disguise uneven growth at the nape during the ‘mullet’ phase with patterned silk scarves tied bandit-style.
- Build a survival toolkit with oversized snap clips and texture spray to manage bad hair moments on the go.
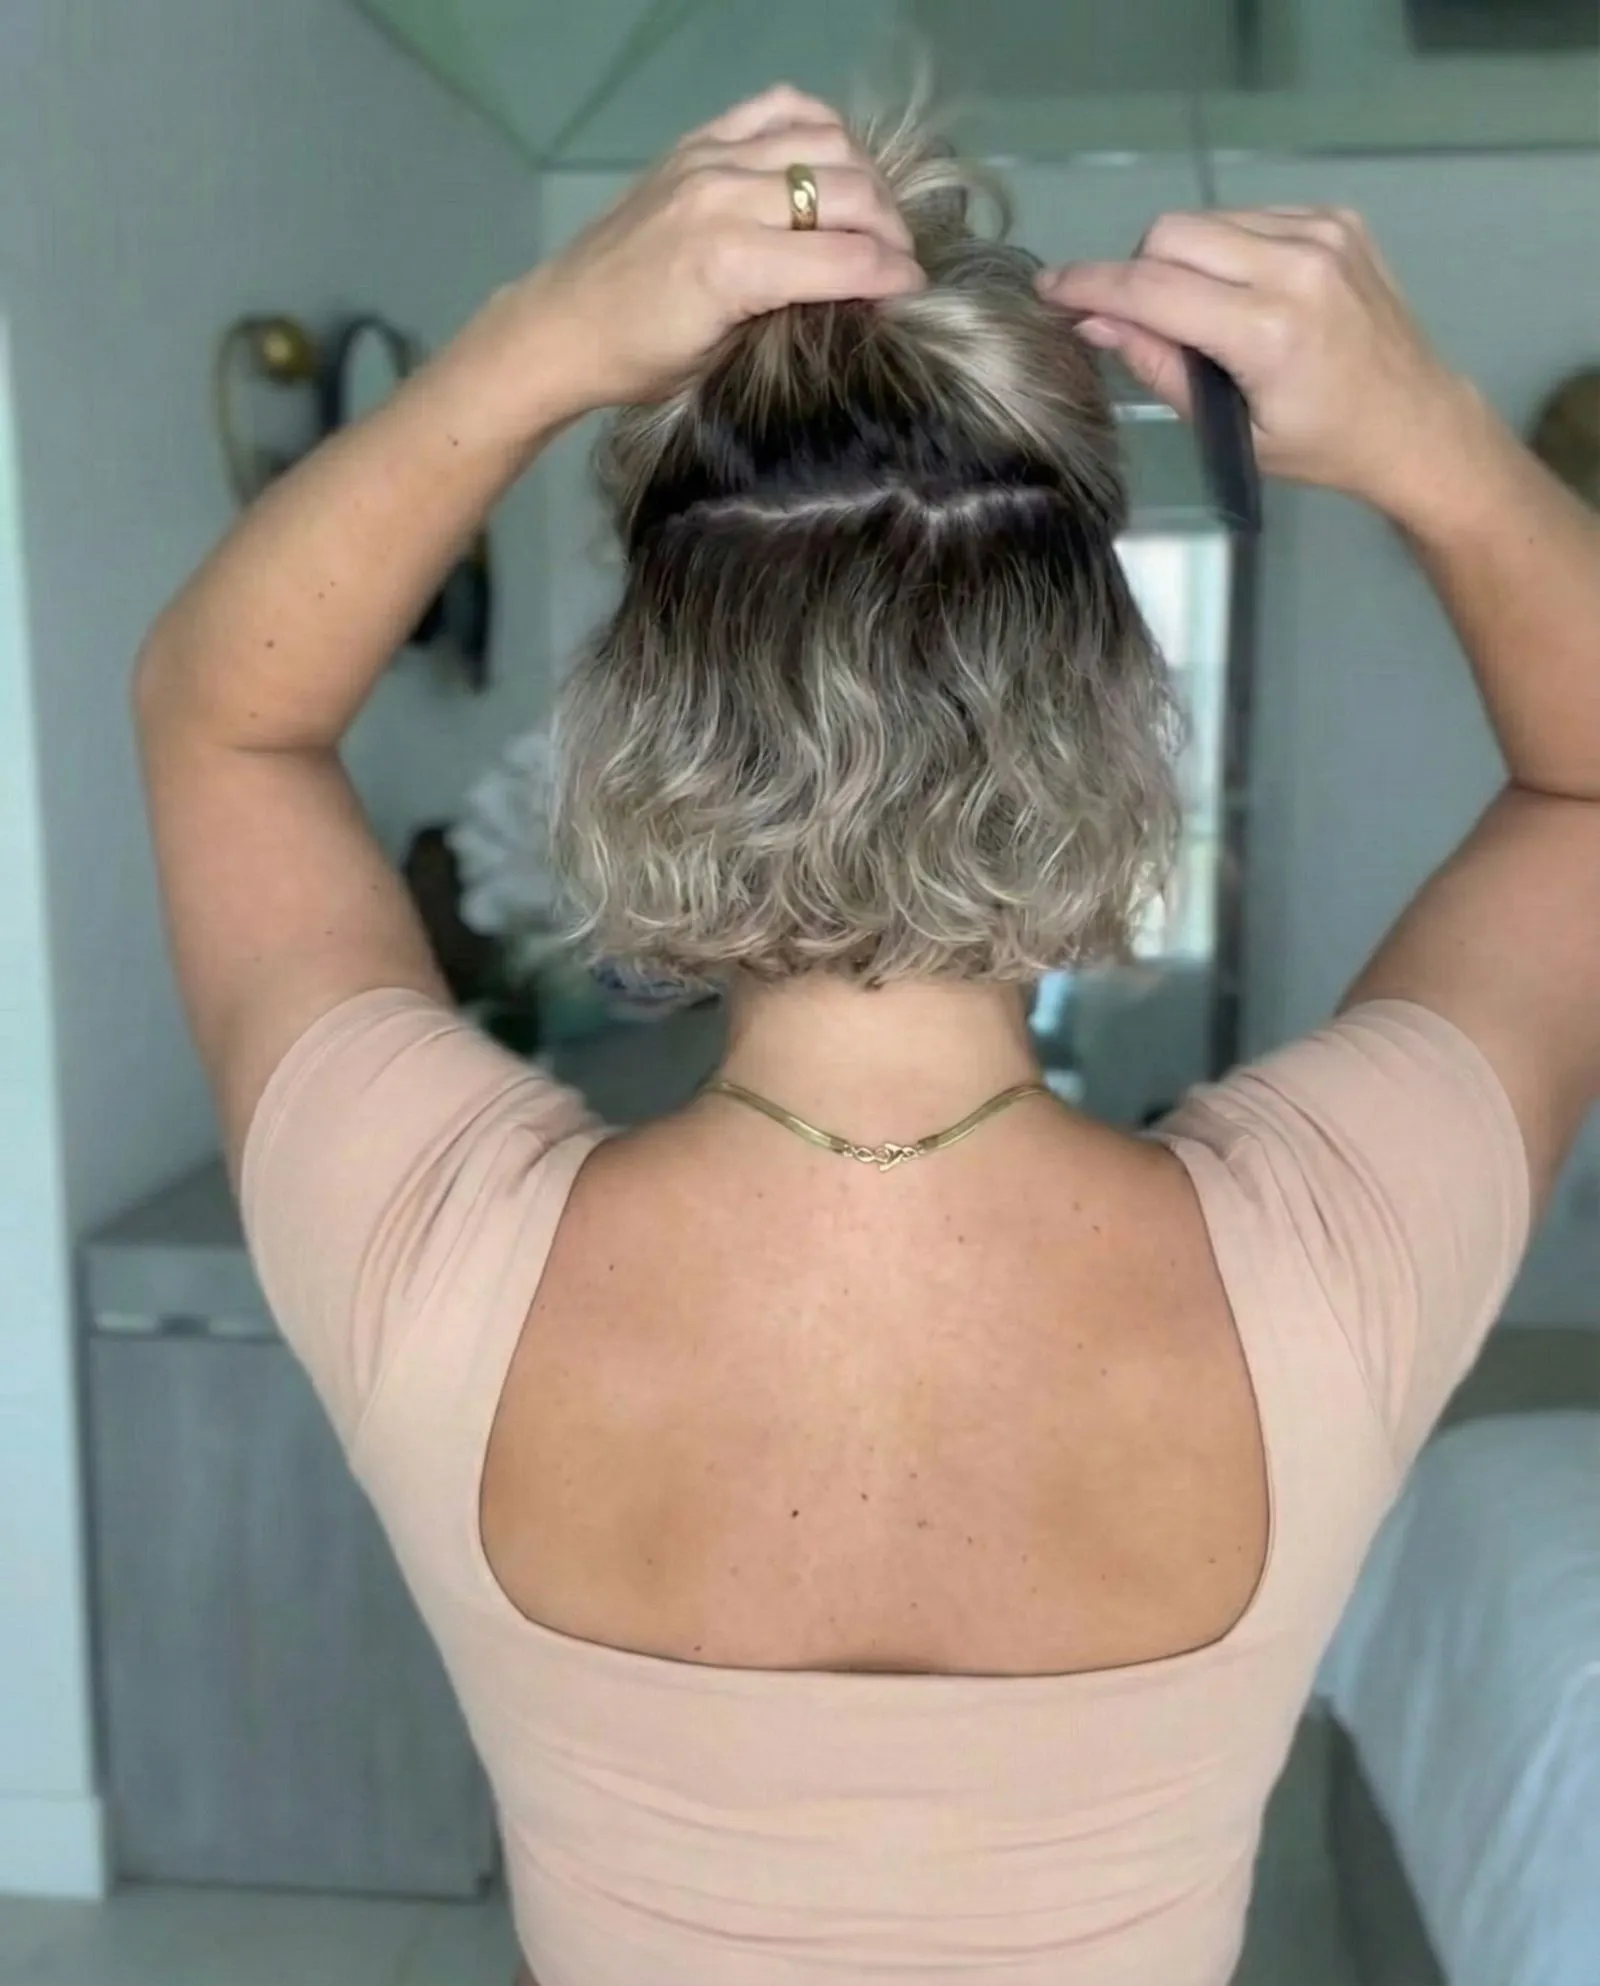
Rock the Half-Up Top Knot to Manage Uneven Layers
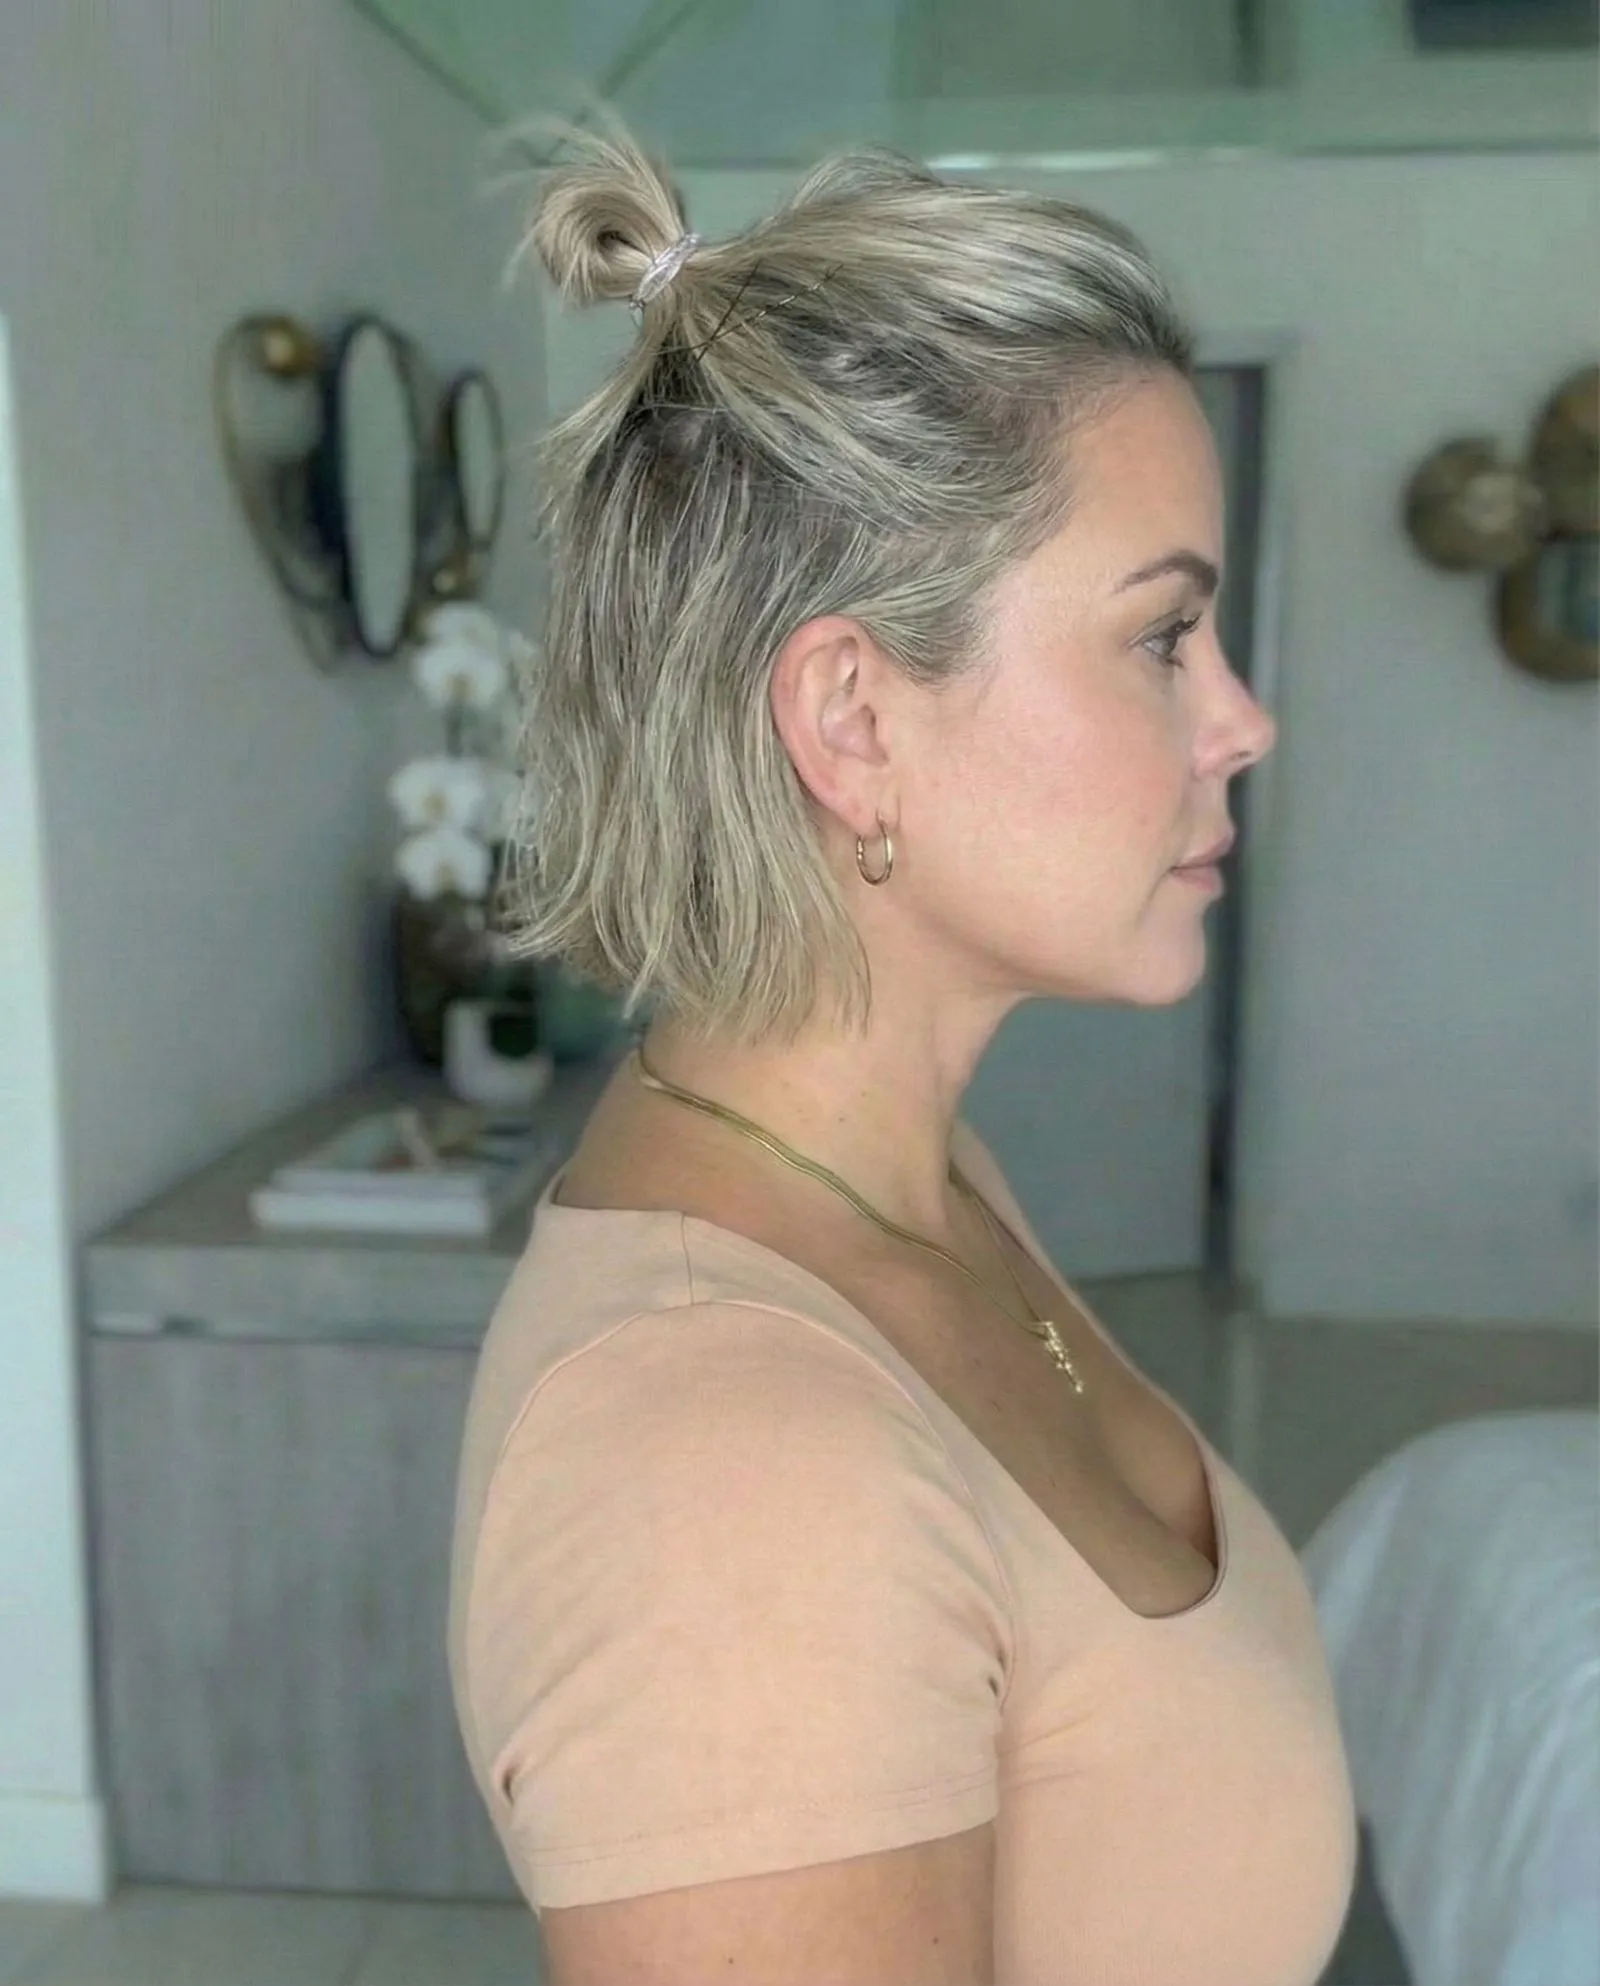
The transition from a sharp bob to a lob often involves a phase where layers refuse to cooperate. The half-up top knot is your chic savior.
This style intentionally embraces the messiness of growing out short hair. It pulls shorter, uneven layers away from the face while keeping length.
“The half-up bun is the ultimate cool-girl hack: it says you tried, but not too hard.”
The Half-Up Hack
- Perfect for navigating the awkward growth phase between a sharp bob and a lob.
- Embraces messy texture to disguise uneven layers effectively.
- Keeps shorter strands away from your face while showing off your length.
Prep Your Canvas for Grip
Slippery, freshly washed hair is the enemy of a sturdy top knot. You need grit to keep those shorter back layers from sliding out of the elastic.
Start by spraying a dry texturizing spray from root to tip. This adds a matte finish and the necessary volume for the bun to look substantial.
For those with fine hair, this step creates the illusion of density. If you have thick or curly hair, it helps define your natural coil pattern.
If you are battling humidity, this prep also prevents frizz. For more ideas on managing heat, check out our guide to easy summer hairstyles.
Texture Talk
- Freshly washed hair is often too slippery for a secure top knot; you need added grit.
- Apply dry texturizing spray from root to tip to provide the necessary matte finish and volume.
- This prep step adds density to fine hair while defining the pattern of curly or thick hair.
- Using texturizer helps combat humidity and keeps frizz under control.
The Sectioning Technique
Section your hair from temple to temple. Drawing the line higher up, near the arch of the eyebrow, creates a “snatched” facelift effect.
Leave the bottom half loose. For a polished look, run a flat iron through the ends. For a bohemian vibe, encourage waves with a salt spray.
Gather the top section into a high ponytail. Secure it tightly with a clear elastic band before wrapping the ends around the base.
I love a half-up look because it pulls the face up and back, giving you an instant eye-lift while keeping the length fun and flirty.
Chris Appleton, Vogue
The Essential Toolkit
Having the right tools ensures your look survives the day without constant touch-ups.
- Texturizing Spray: Provides grit so the elastic does not slip down silky strands.
- Clear Polybands: These disappear into the hair, making the style look seamless and professional.
- U-Shaped Pins: Better than standard bobby pins for locking a messy bun in place without flattening it.
- Smoothing Brush: A boar bristle brush helps tame flyaways near the hairline for a sleek contrast.
The Style Edit
- Section hair high, from temple to temple, to create a snatched, face-lifting effect.
- Customize the loose bottom layer with a flat iron for polish or salt spray for waves.
- Use texturizing spray to add grit, preventing elastics from slipping on silky strands.
- Opt for clear polybands and U-shaped pins to keep the style seamless and voluminous.
Elevate with Accessories
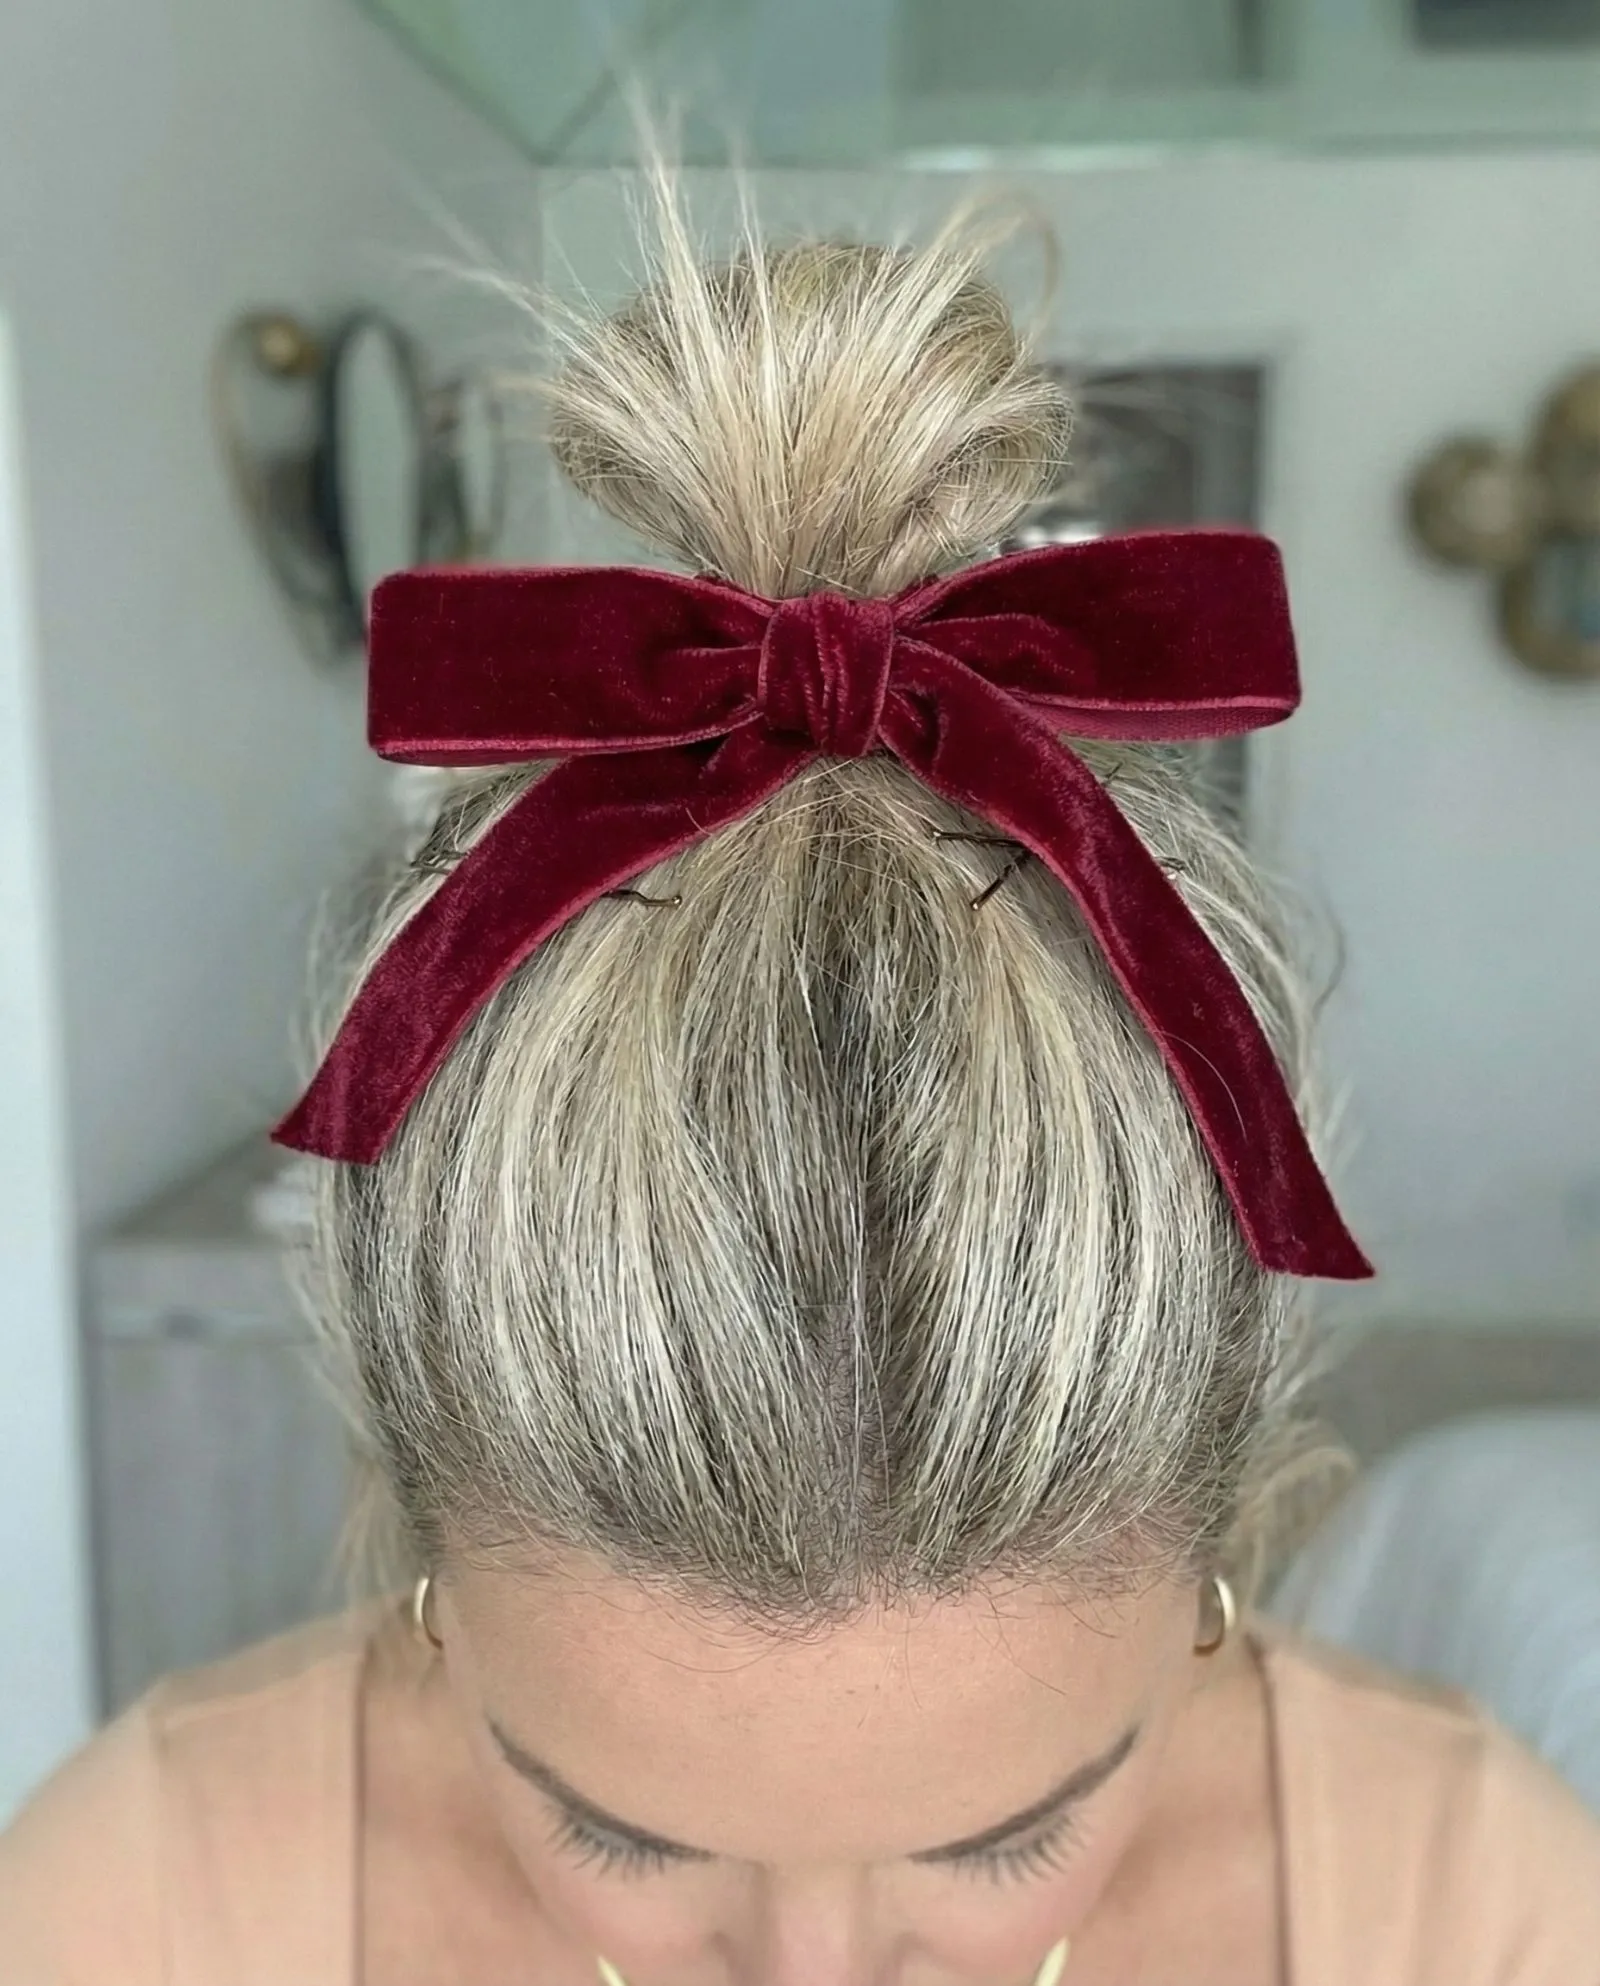
If your ends are spiking out aggressively, hide them. Wrap a silk scrunchie around the bun for a soft, romantic aesthetic.
Velvet bows in rich tones like burgundy or midnight blue instantly make the style feel intentional and expensive, rather than messy.
This trick is perfect for diverse textures. If you have Type 3 or 4 hair, see our curly hairstyles guide for more styling inspiration.
Style Secret
- Conceal aggressive spikes by wrapping the bun with a silk scrunchie for a softer, romantic aesthetic.
- Elevate the look with velvet bows in rich tones to make the style feel intentional and expensive.
- Apply these accessorizing tricks to diverse hair textures for a polished finish.
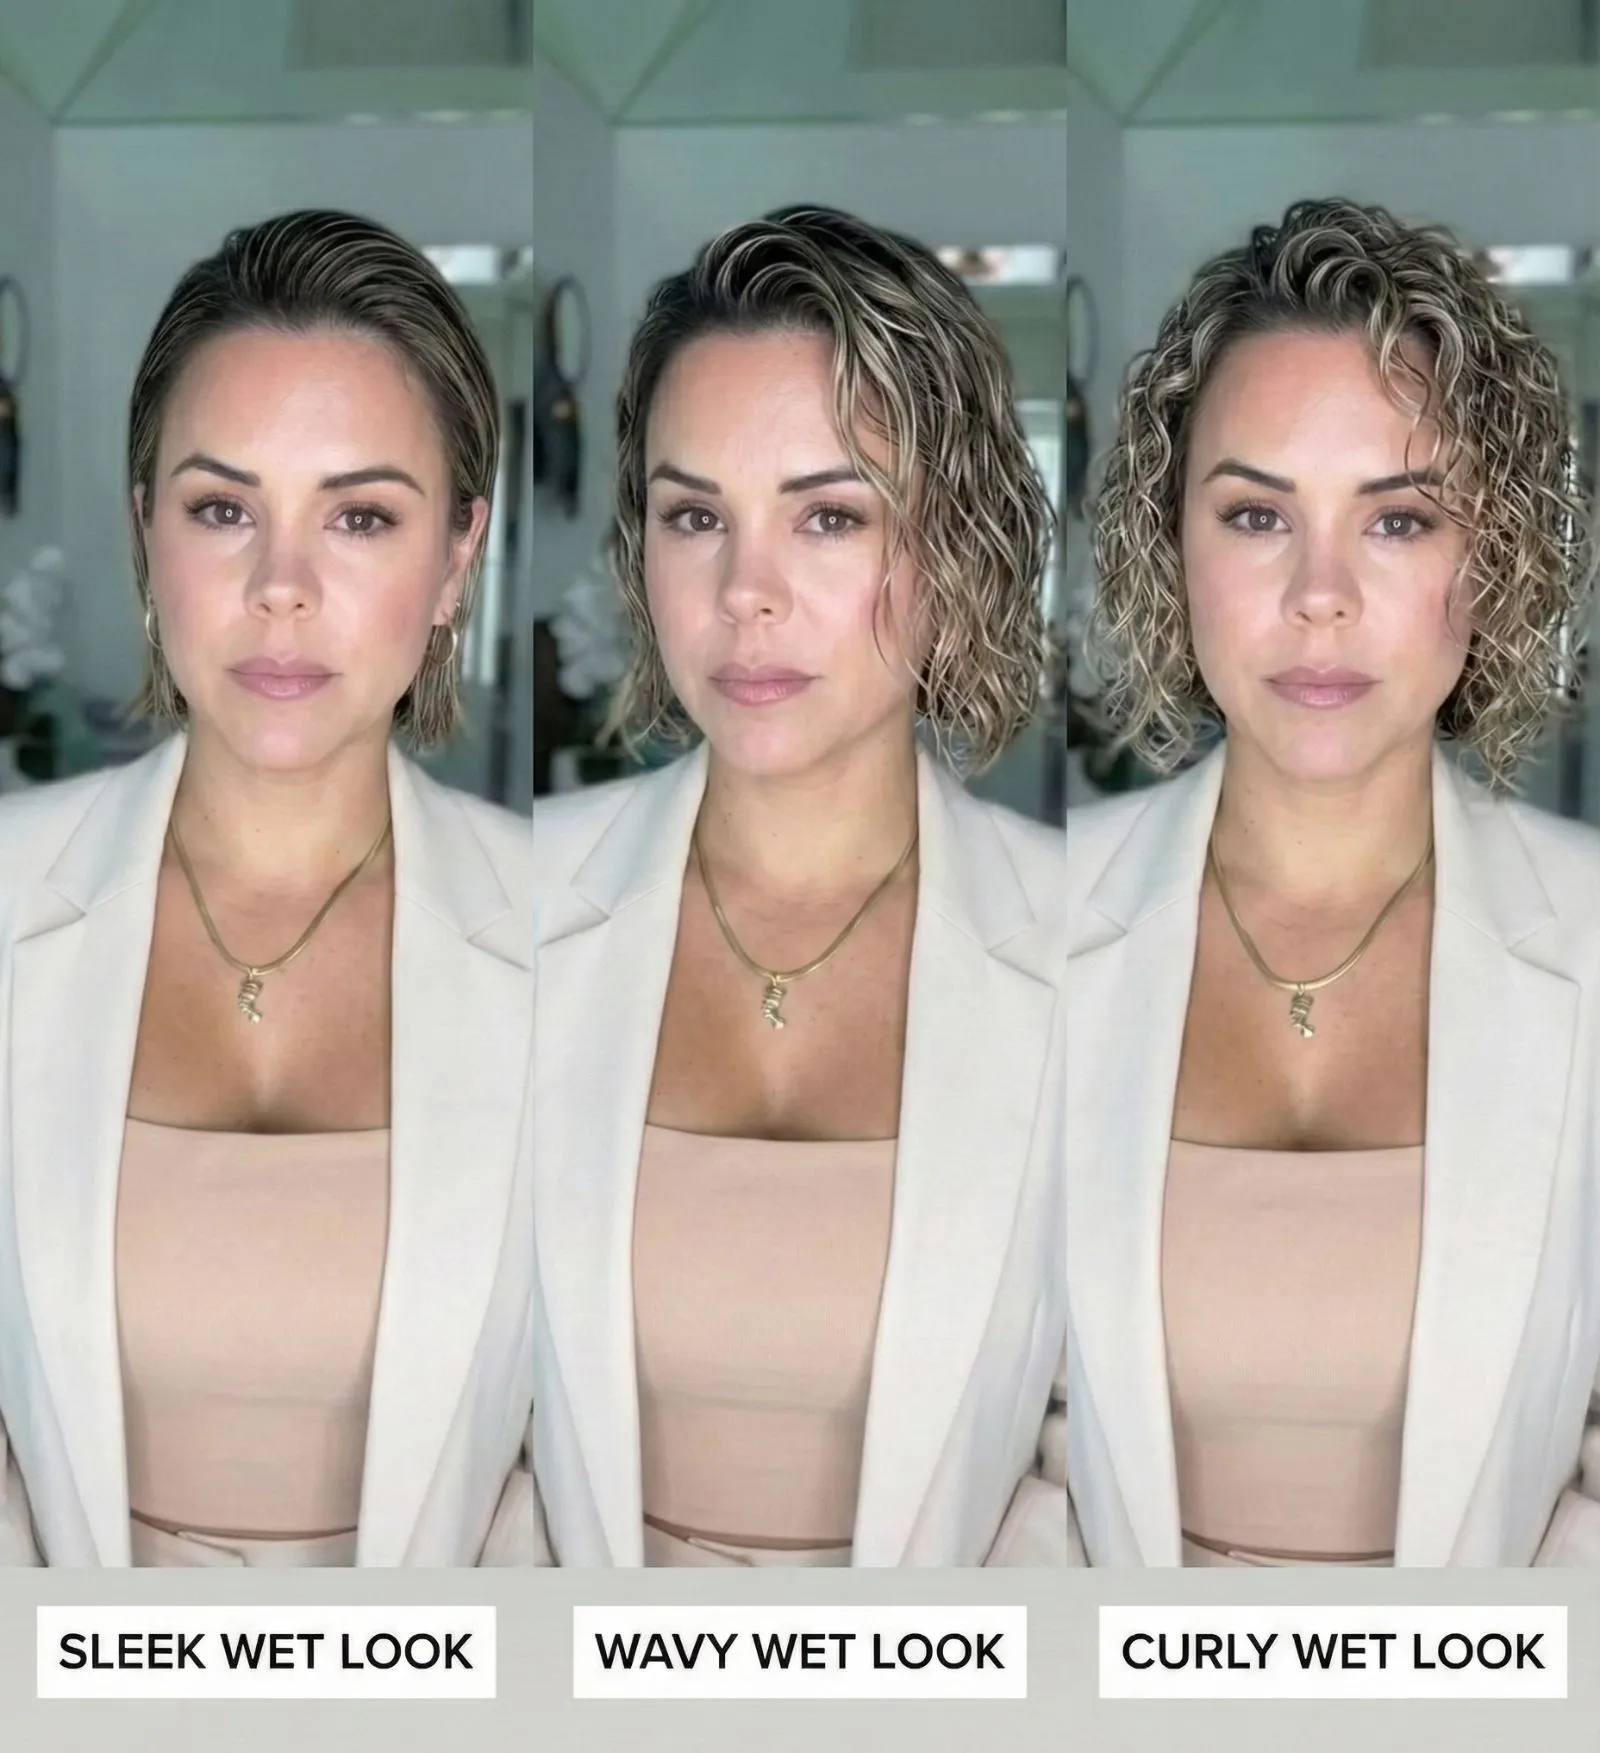
Experiment with the Slicked-Back Wet Look for Polish

When layers start to feel unruly, the slicked-back aesthetic is your secret weapon. It transforms awkward volume into a deliberate, high-fashion statement.
This style works by smoothing shorter layers flat against the head. It creates a seamless silhouette that hides uneven growth patterns instantly.
The “wet look” implies intentionality. It suggests you just stepped off a runway, rather than just skipping a trim. It is the epitome of effortless cool.
“Turn your grow-out pains into high-fashion gains by mastering the art of the intentional slick-back.”
Style Strategy
- Use the slicked-back look to tame unruly layers and awkward volume.
- Smooth shorter layers flat to disguise uneven growth patterns.
- Leverage the ‘wet look’ to create a deliberate, high-fashion aesthetic.
The Product Cocktail
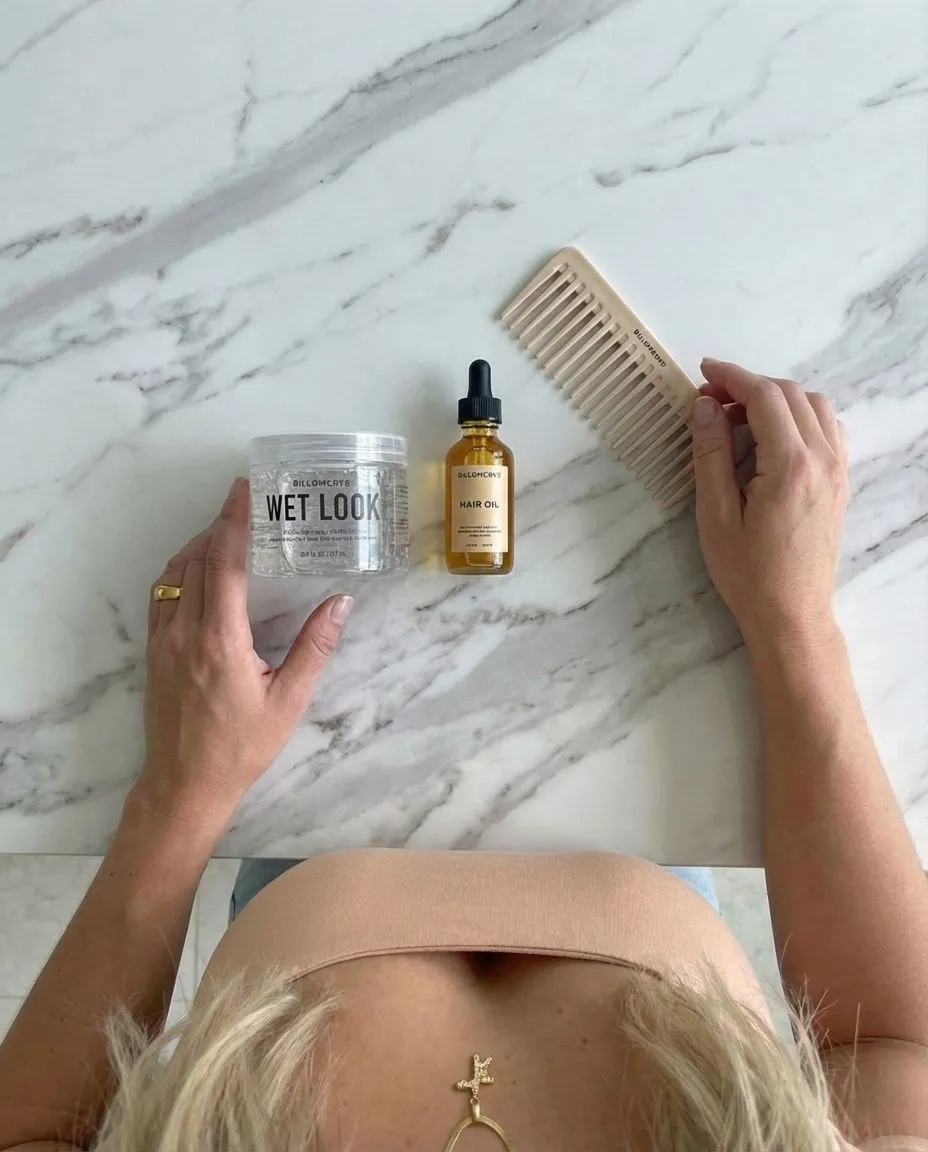
Creating this look requires more than just water. Water evaporates and leaves frizz. You need a mix of hold and hydration to maintain that glass-like shine.
Start with damp, towel-dried hair. Mixing a strong-hold gel with a nourishing oil prevents the hair from drying stiff or “crunchy” like a helmet.
If you have textured hair, this style is a perfect protective option. For more inspiration on managing texture, explore these curly hairstyles.
For a wet look that lasts, don’t use just water. Load up on a deep conditioning mask. It gives you the wet texture while treating your strands all day.
Vernon François, Vogue
The Glossy Formula
- Skip plain water, which evaporates quickly and leads to frizz instead of a sleek finish.
- Create a ‘cocktail’ by mixing strong-hold gel with nourishing oil to ensure hold without the crunch.
- Substitute styling products with a deep conditioning mask to treat your hair while maintaining the wet look.
- Utilize this style as a protective option for textured hair to lock in moisture.
Execution: Step-by-Step Polish
Achieving a clean finish requires precision. Follow this routine to ensure your choppy layers stay tucked away all day long.
- Dampen and Detangle: Start with hair that is 60% wet. Use a wide-tooth comb to remove tangles gently.
- Apply Product Generously: Coat strands from root to tip. Ensure the product saturates the hair near the ears where layers are shortest.
- Create Tension: Use a boar bristle brush to smooth hair back tightly. The tension is key to hiding shorter pieces.
- Secure the Sides: Tuck hair behind your ears. Use creaseless clips while it dries to lock the shape in without dents.
Sleek Styling Essentials
- Start with damp, detangled hair (around 60% wet) to create the optimal base for styling.
- Saturate strands thoroughly with product, focusing heavily on the shorter layers near the ears.
- Use a boar bristle brush to create high tension, which helps smooth down and hide choppy pieces.
- Lock in the shape using creaseless clips while the hair dries to prevent dents and flyaways.
Customizing for Your Texture
Not every hair type reacts the same to gel. Customizing your product choice ensures your hair stays healthy and the style stays put.
Fine hair needs lightweight formulas to avoid looking greasy. Thick or coarse hair demands heavier creams to suppress volume and boost shine.
This style is also a lifesaver during humidity. If you are planning a trip, check out these easy summer hairstyles for more heat-proof ideas.
| Hair Texture | Product Cocktail | Application Tip |
|---|---|---|
| Fine / Thin | Lightweight Mousse + Serum | Focus gel only at the roots to avoid weighing down ends. |
| Wavy / Medium | Strong Hold Gel + Hair Oil | Mix products in your palm before applying for even distribution. |
| Coily / Thick | Leave-in Cream + Edge Control | Apply in sections to ensure every strand is coated and smoothed. |
Texture Toolkit
- Tailor your product cocktail to your specific hair type to ensure the style holds without damaging strands.
- Fine hair requires lightweight formulas like mousse applied at the roots to avoid a greasy finish.
- Thick and coily textures benefit from heavier creams and sectioned application to suppress volume.
- Adapting your routine for humidity ensures your sleek look stays heat-proof and polished.
Schedule Regular Micro-Trims to Even Out the Baseline
It sounds counterintuitive to cut your hair when you are desperate for length. However, growing out a choppy bob requires strategic maintenance.
Without regular intervention, the shorter layers of your bob will grow at different rates than the perimeter. This creates a shapeless look.
Split ends are the enemy of length retention. If left unchecked, a split end will travel up the hair shaft and cause significant breakage.
“Length means nothing without health. A blunt, healthy hemline always looks longer and more luxe than wispy, broken ends.”
This breakage makes your hair appear to stop growing entirely. A micro-trim seals the cuticle and ensures every inch you gain is healthy and strong.
While you wait for your layers to align, consider using protective looks like winter braid hairstyles to minimize daily manipulation.
The Art of the “Dusting”
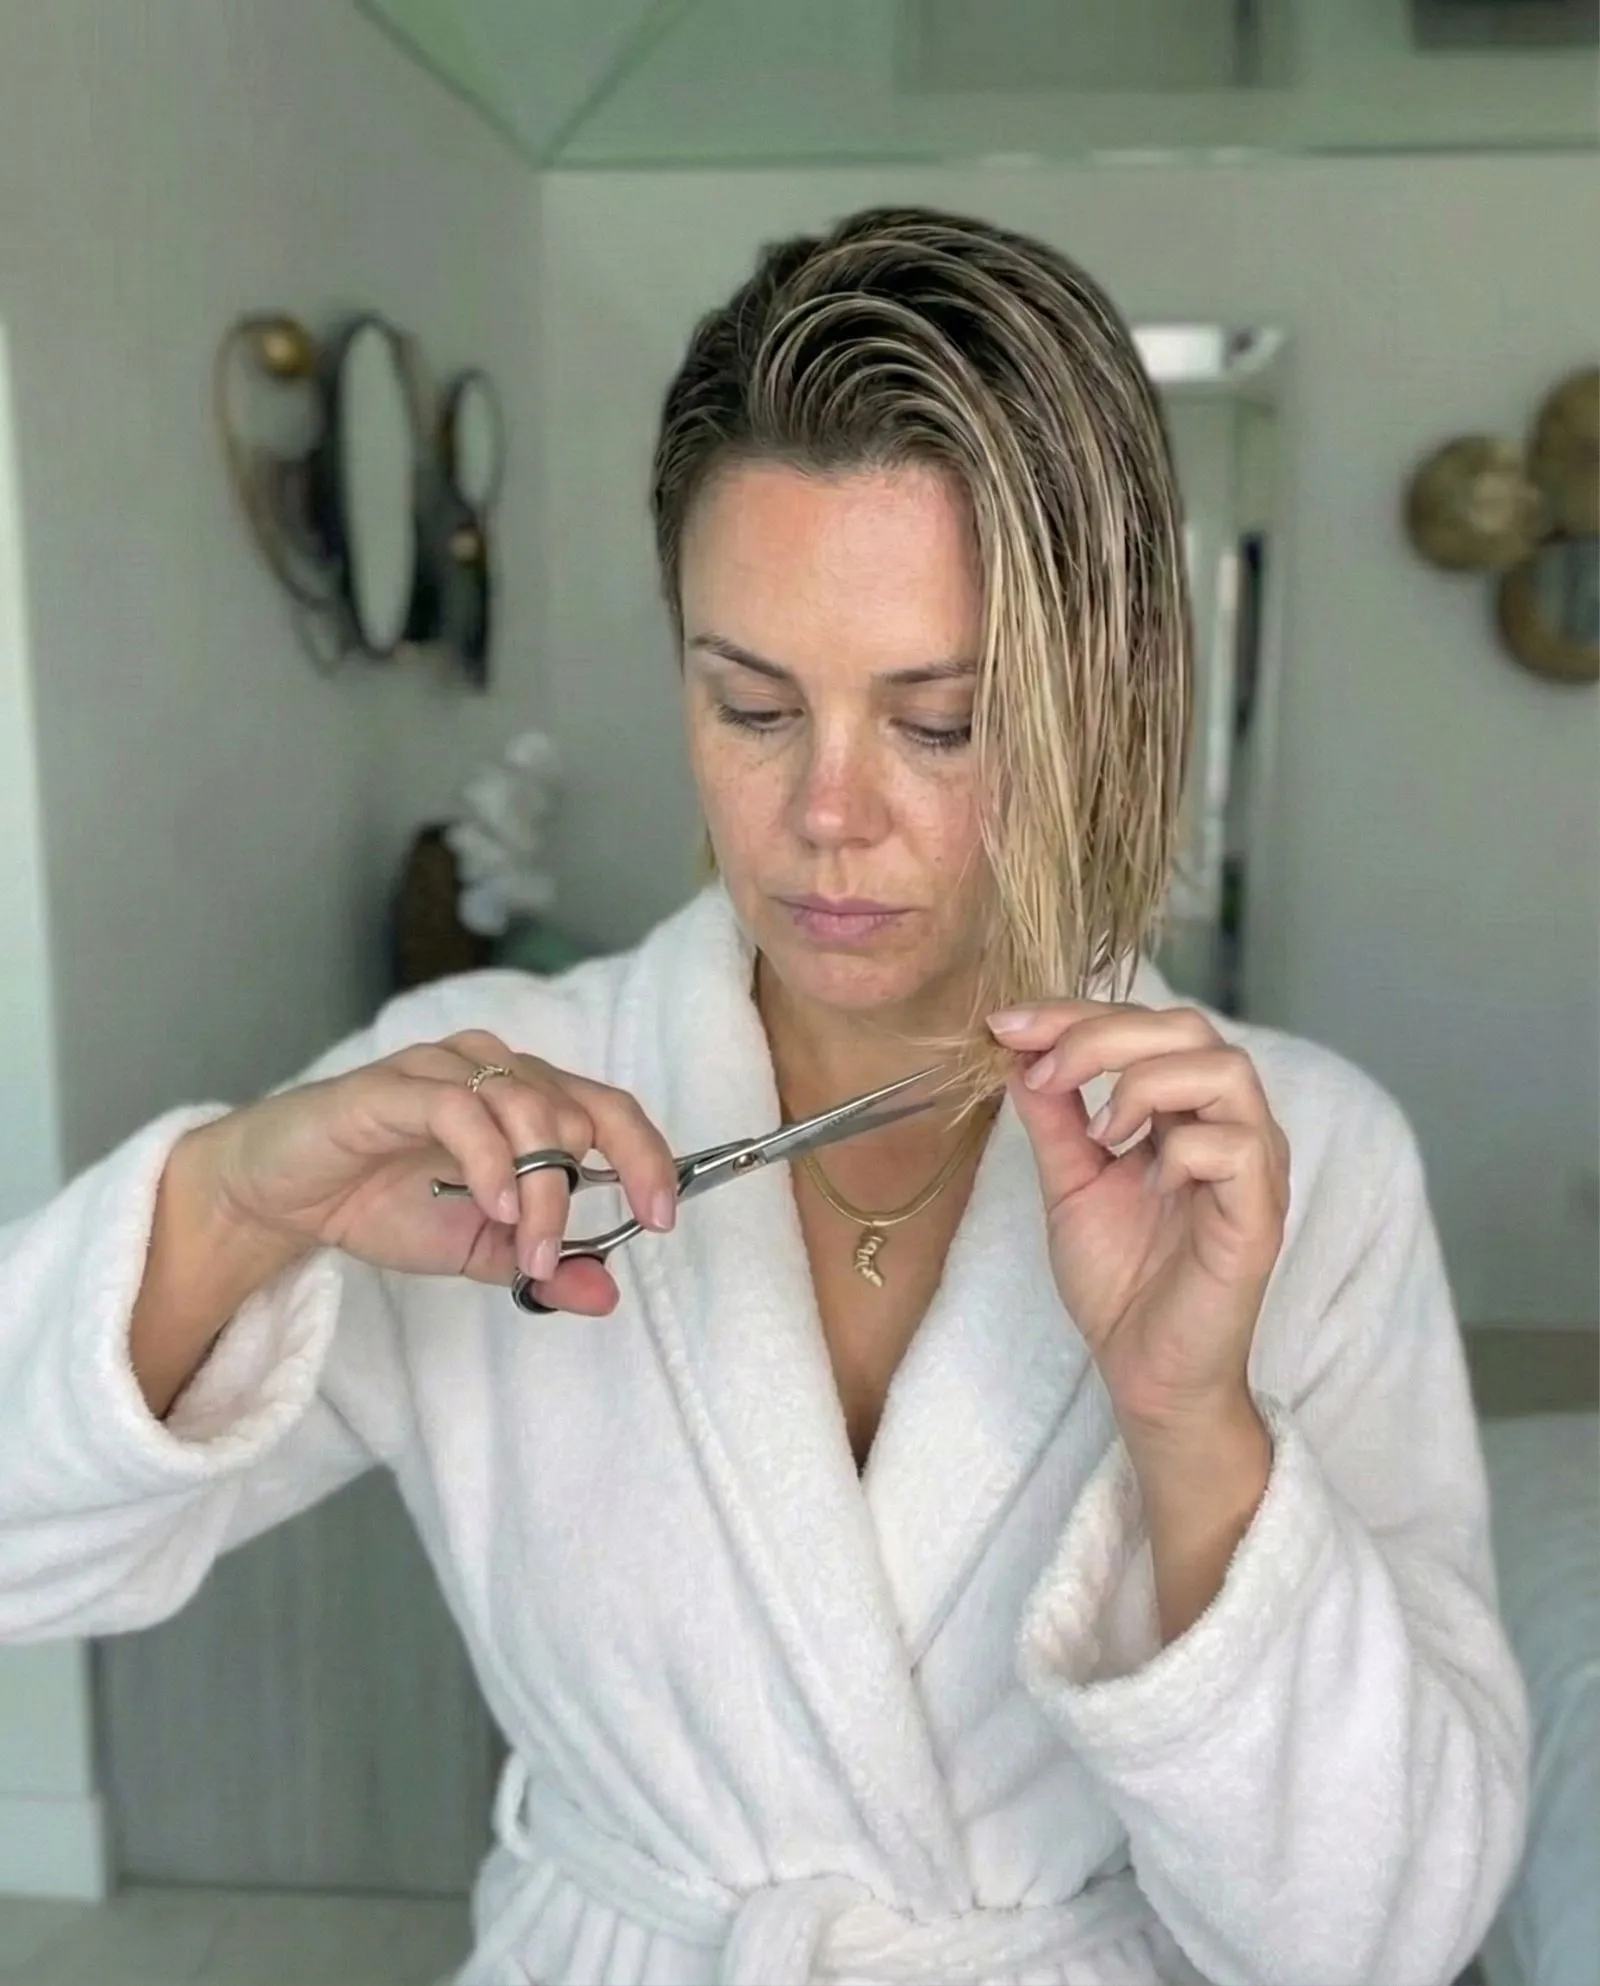
You must be very specific with your stylist. Ask for a “dusting” rather than a full trim. This removes less than an eighth of an inch.
The goal is to target only the damaged tips without touching the overall length. This technique keeps your baseline crisp and intentional.
It’s important to get a trim every 10 to 12 weeks. This keeps the ends blunt and healthy, which makes the hair look thicker.
Mark Townsend, Harper’s Bazaar: How to Grow Out Your Hair
For those with textured or curly hair, this process helps maintain the shape of your coils. It prevents the “triangle” shape common during growth phases.
Ideal Trimming Schedule
Your trimming frequency depends on your hair texture and chemical history. Use this guide to plan your salon visits for maximum growth retention.
| Hair Type & Condition | Recommended Frequency | The Strategy |
|---|---|---|
| Fine, Straight Hair | Every 8-10 Weeks | Keeps the perimeter blunt to create the illusion of density and fullness. |
| Thick or Coarse Hair | Every 10-12 Weeks | Focus on debulking internal layers to prevent the style from puffing out. |
| Curly & Coily Textures | Every 12-14 Weeks | Trim coil-by-coil to maintain shape without losing the spring factor. |
| Bleached or Damaged | Every 6-8 Weeks | Frequent dusting is mandatory to stop breakage from chemical processing. |
Stick to this schedule religiously. Skipping appointments often leads to needing a significant chop later to fix neglected damage.
If you are struggling with styling during this phase, temporary options like gorgeous weave hairstyles can offer a break while your natural hair grows.
Trim Tactics
- Schedule regular micro-trims to stop split ends from traveling up the hair shaft and causing breakage.
- Request a ‘dusting’ at the salon to remove damaged tips without sacrificing your overall length.
- Customize your appointment frequency between 6 to 14 weeks based on your specific hair texture and health.
Embrace the Messy Middle
Growing out a choppy bob is a style journey, not just a waiting game. It is about finding distinct beauty in the imperfection of the process.
Remember that volume and texture are your best allies right now. Use that texturizing spray liberally to fake a fresh, intentional look.
Don’t rush the process. With the right products and a confident attitude, this awkward stage can actually become your most stylish era yet.
The Grow-Out Edit: Your Curiosities
Aim for a ‘dusting’ every 10 to 12 weeks. You only want to remove split ends to maintain health, not significant length, to keep momentum.
You can, but proceed with caution. Salt sprays add texture but can be drying. Texturizing sprays usually offer grit without the crunchy finish.
Lean into the flip! Use a flat iron to flick the ends out purposefully. It turns a growth-pain annoyance into a retro-chic style statement.
Accessories are absolute lifesavers. Chic barrettes, padded headbands, and silk scarves hide uneven layers and instantly elevate the look.