October hits, and suddenly everything is pumpkin spice, cozy sweaters, and a low-key obsession with all things spooky.
The vibe is immaculate, and let’s be real, your nails are a prime canvas for getting in on the fun.
Between planning your costume and stocking up on candy, figuring out your manicure can feel like a last-minute scramble.
But a killer nail design doesn’t just complete your look; it sets the mood for the entire month and prevents the dreaded “boring polish” blues.
Honestly, nobody wants to show up to the Halloween party with plain nails when you could have tiny ghosts dancing on your fingertips.
We’re aiming for manicure envy, the kind that makes your friends ask, “Wait, you did those yourself?”
So, ditch the basic, embrace the extra, and get ready to explore these 15 spooky designs that are total game-changers.
Consider these your ultimate cheat codes for a flawless “”Spooky Season Manicure””, blending creativity, fun, and a touch of gothic glam.
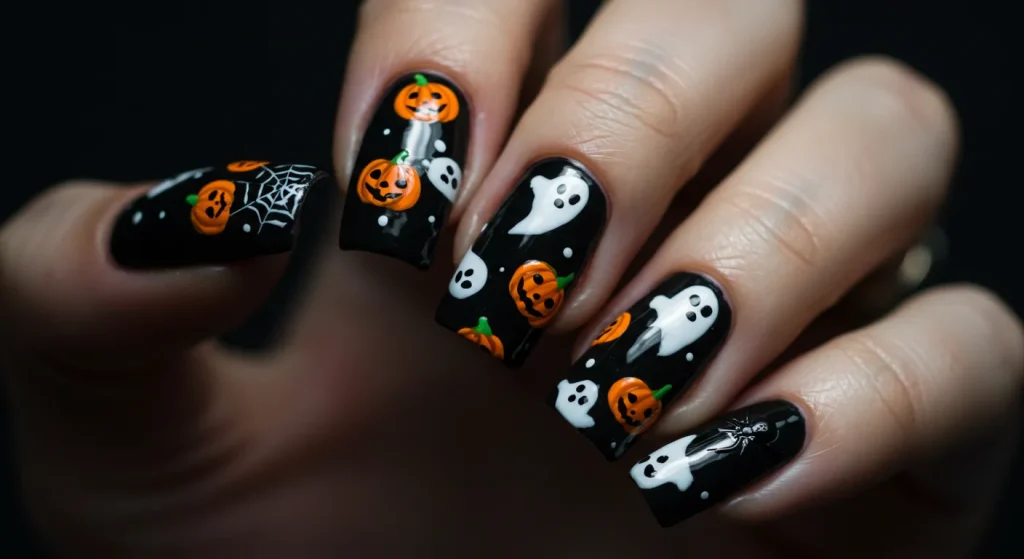
1. The Classic Ghost Crew
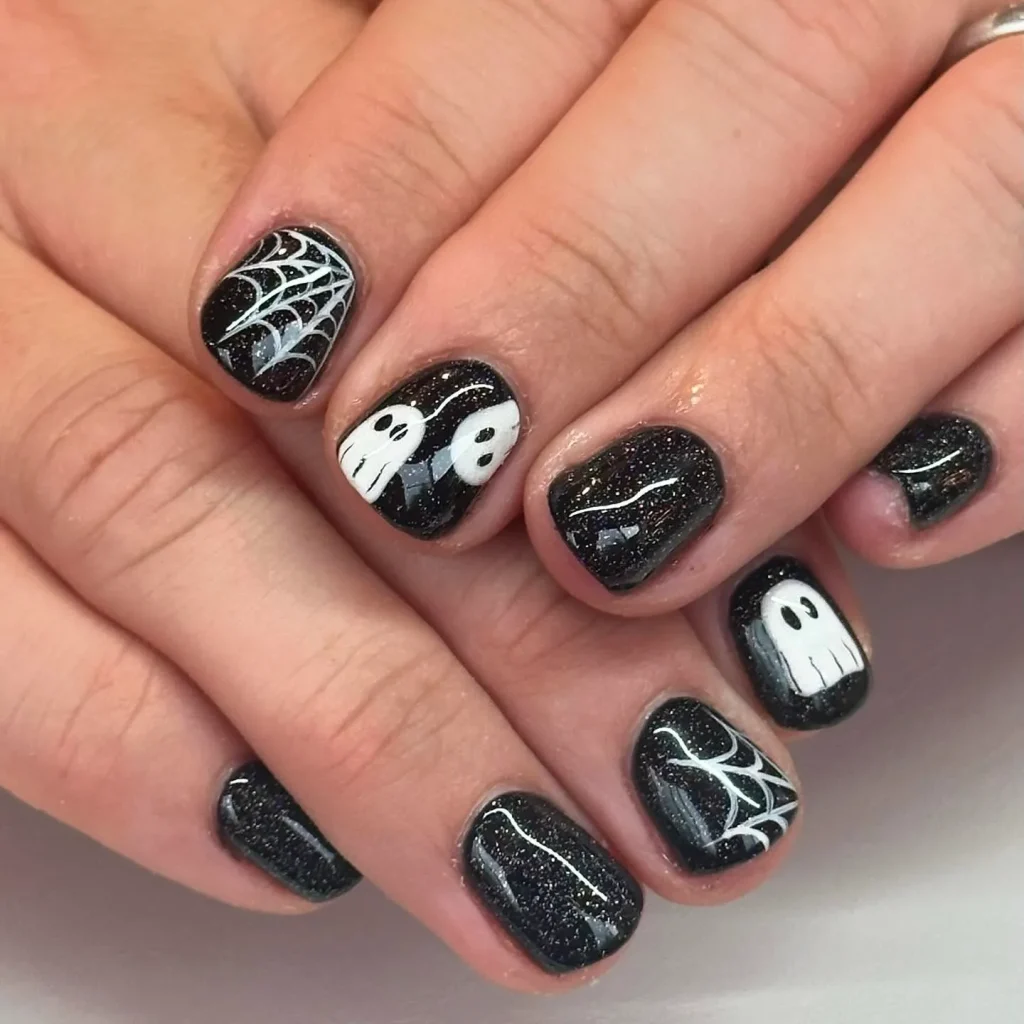
Forget complicated. Let’s start with a certified classic.
Paint your nails a solid black or a deep purple.
Once dry, use a dotting tool (or the tip of a bobby pin) to create a white, slightly wavy blob.
Add two smaller black dots for eyes, and boom you’ve got a ghost.
These little guys are easy for beginners, super cute, and instantly recognizable.
It’s a simple move that seriously upgrades your nail game, making it a perfect entry into “”Halloween Nail Art””.
2. Gothic Blood Drips
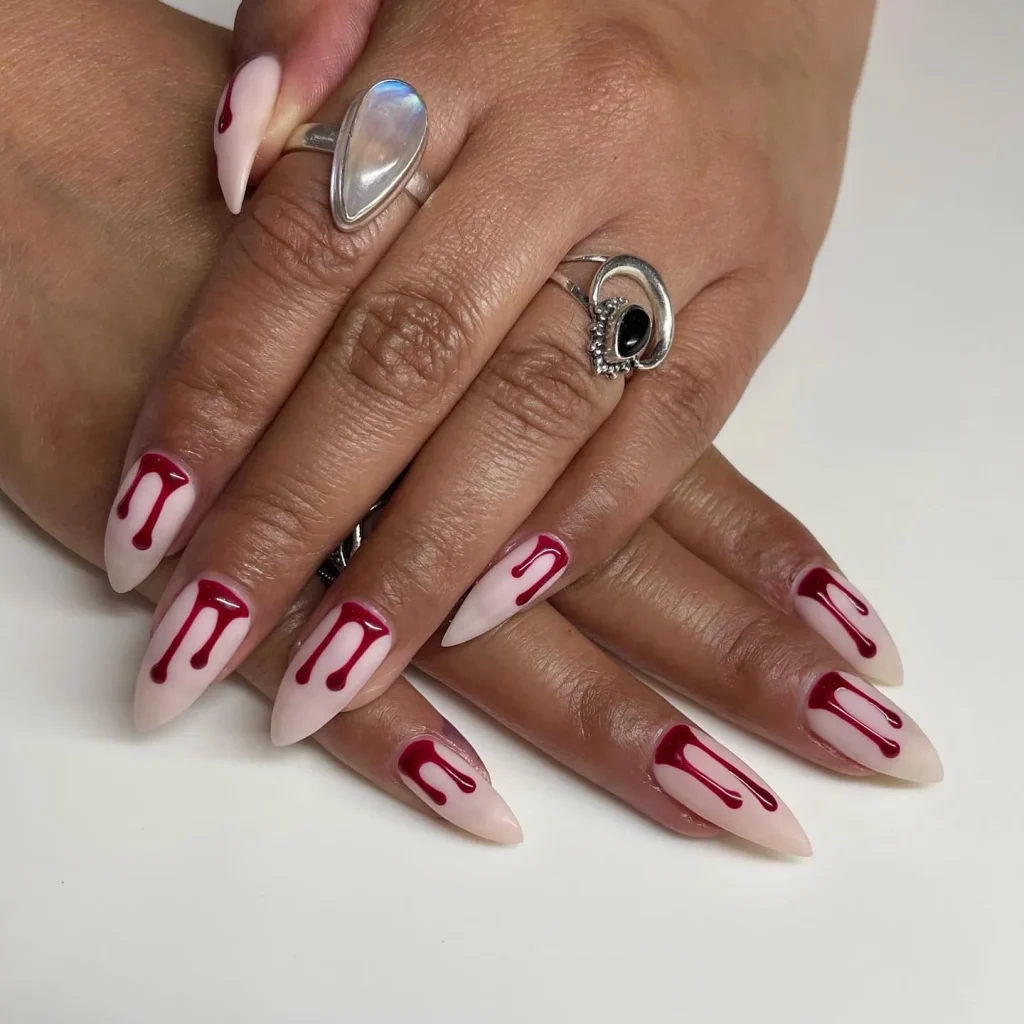
If you’re going for a more edgy, vampire-chic look, this one’s for you.
Start with a nude or pale pink base to make the red pop.
Then, place a few dots of deep red polish near your cuticles.
Use a super-thin brush to drag the dots downward in a “drip” pattern.
The key is to make the drips slightly different lengths for a more realistic effect.
This design is surprisingly easy but looks incredibly high-effort.
It’s a top-tier choice for any “”Gothic Nail Designs”” collection.
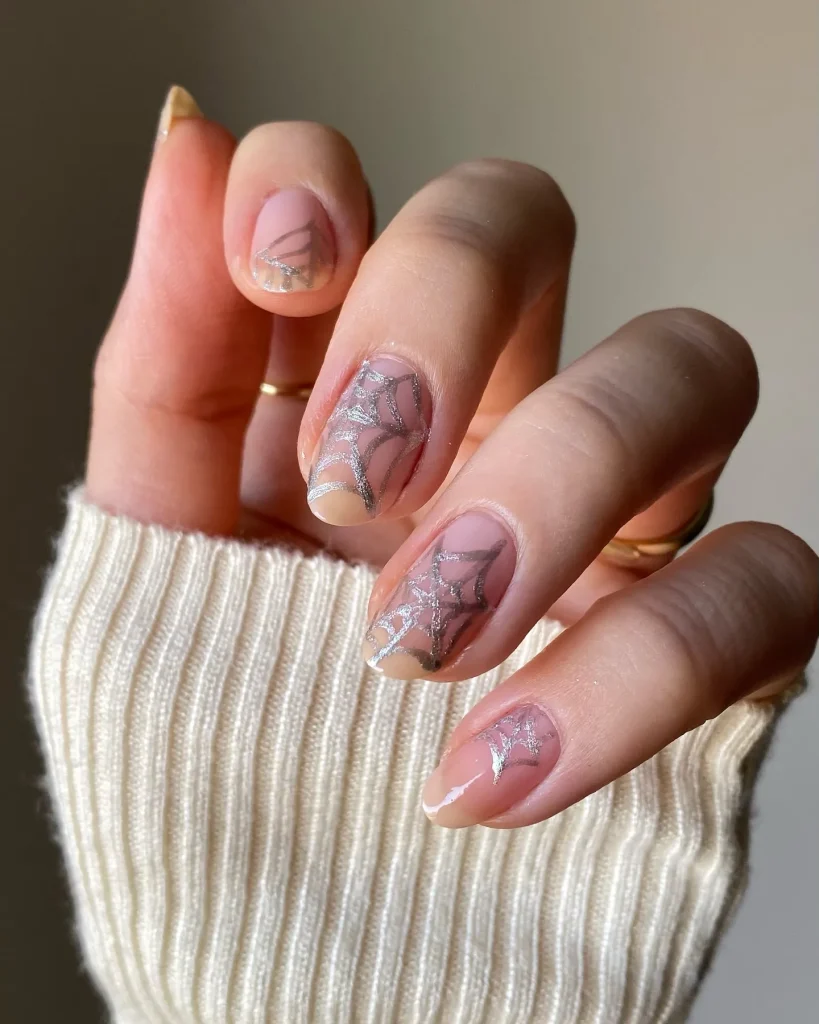
3. Spiderweb Chic
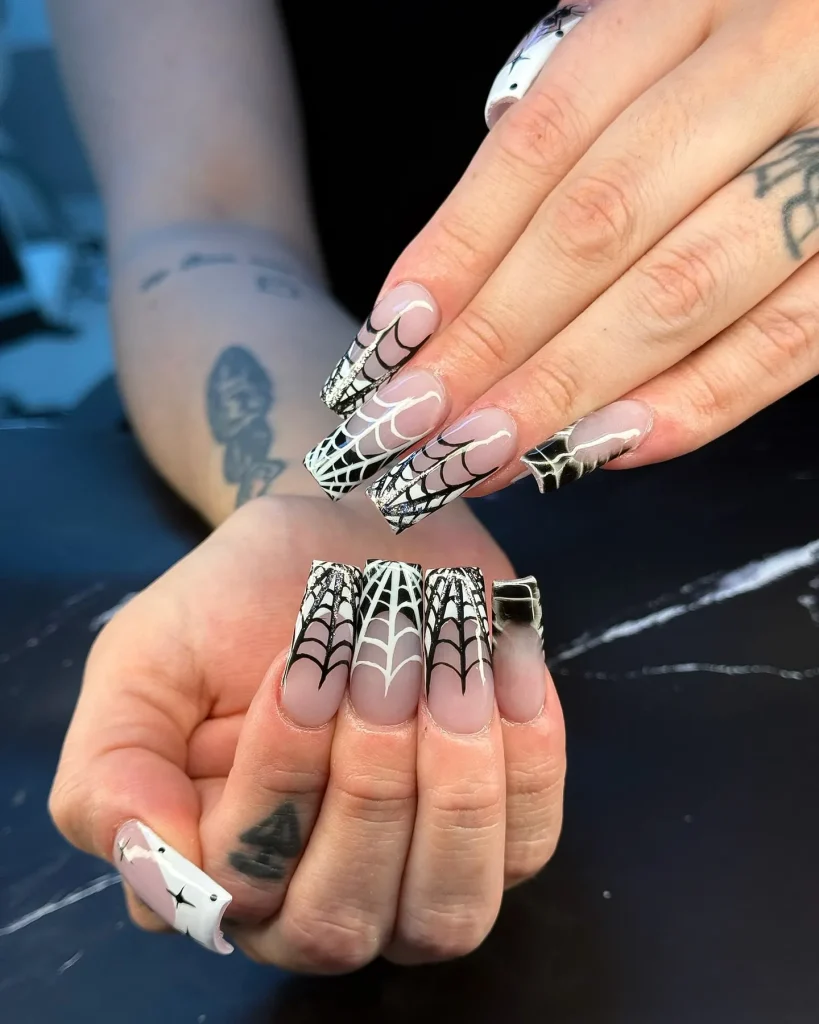
Is it even Halloween without a spiderweb?
This design is iconic for a reason. Paint your nail black, grey, or even a dark orange.
Using a thin striping brush and white polish, draw three or four lines radiating from one corner of your nail.
Connect them with curved, scalloped lines.
You don’t have to do it on every nail – an accent nail on your ring finger is a total power move.
It’s a sophisticated take that feels both spooky and stylish.
4. Sweet & Spooky Candy Corn Ombré
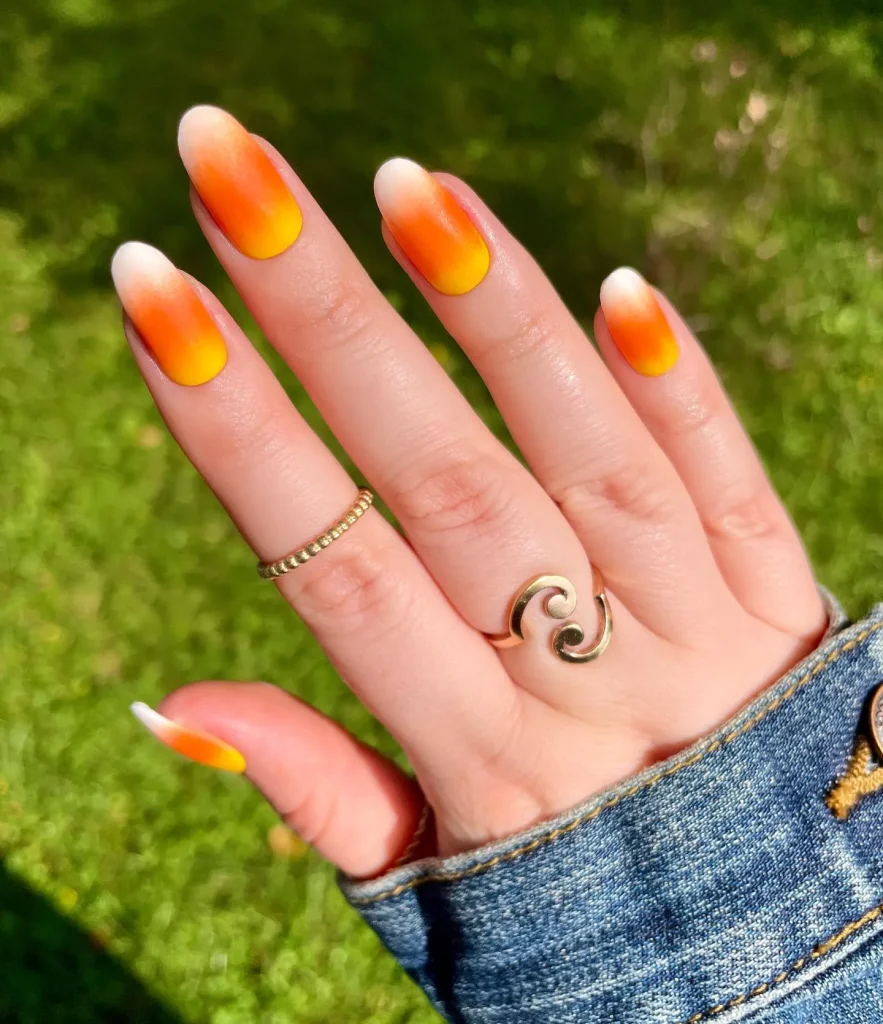
Love it or hate it, candy corn is low-key iconic.
This design is way easier than it looks. You’ll need a disposable makeup sponge.
Paint stripes of yellow, orange, and white polish directly onto the sponge, then gently dab it onto your nail.
Clean up the edges with a brush dipped in acetone, add a top coat, and you’re done.
It’s a fun, colorful look that screams Halloween, making it one of the best “”October Nail Ideas””.
5. Minimalist Black Cat
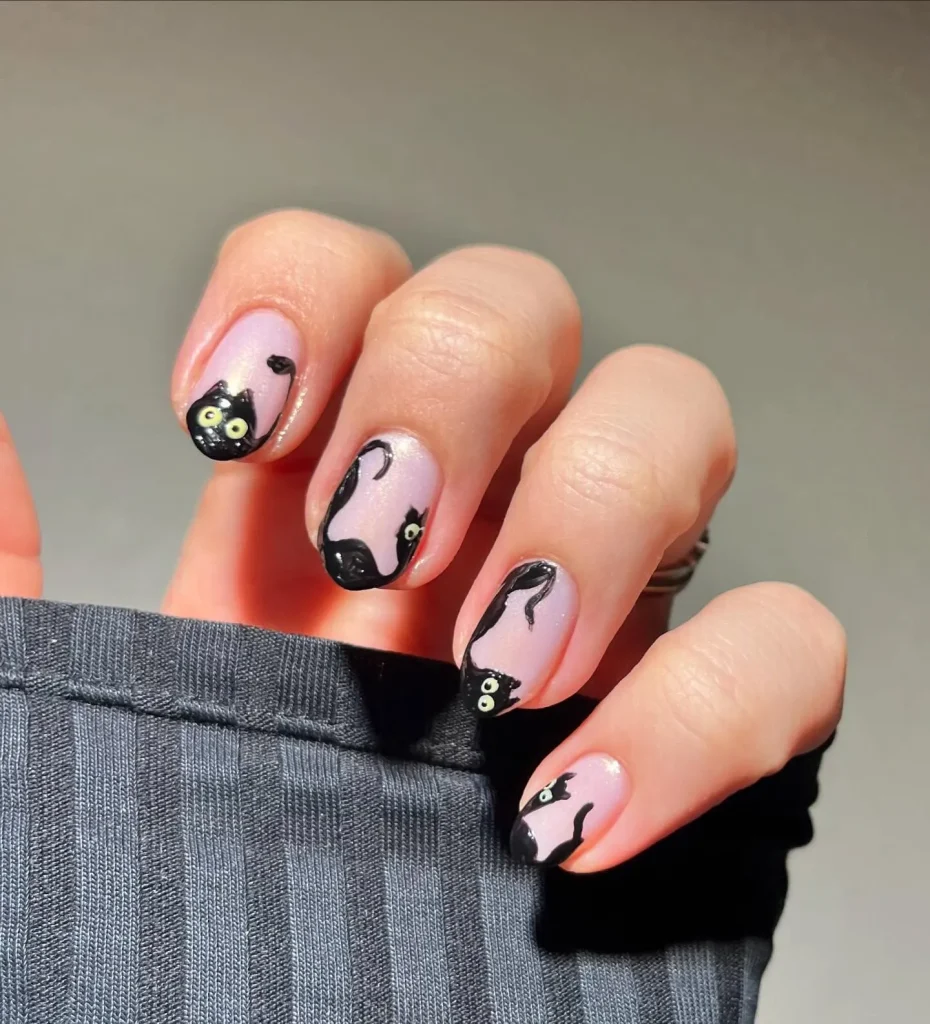
For a look that’s more cute than creepy, the black cat is a winner.
Paint your nails a neutral color like light grey, beige, or pale orange.
Using a thin brush and black polish, paint a small half-circle for the head and two tiny triangles for ears.
Seriously, that’s it. It’s subtle, modern, and perfect for anyone who wants to be festive without going over the top.
This is the definition of “”Cute Halloween Nails””.
6. Frankenstein’s Stitches
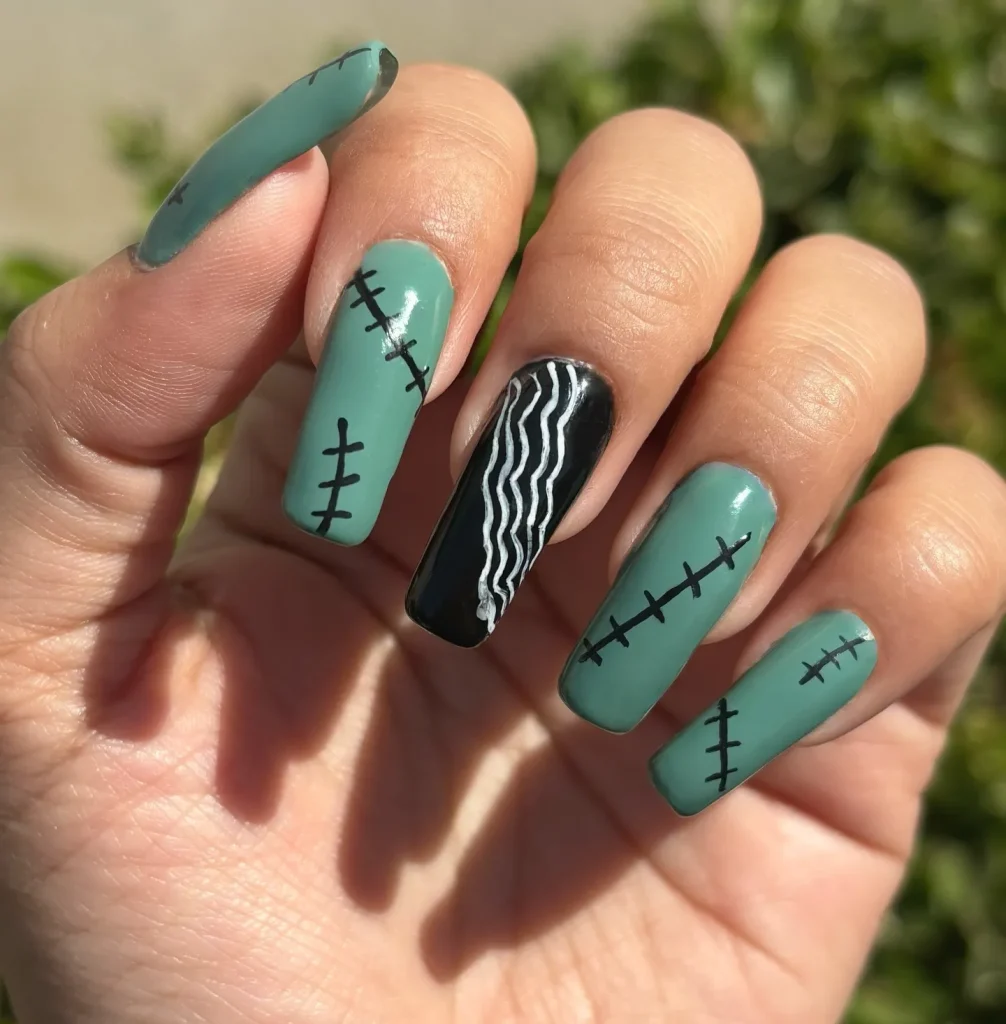
This one brings all the mad scientist vibes. Paint your nails a ghoulish green.
Once it’s dry, use a thin black brush to paint a few simple horizontal or vertical lines to look like stitches.
You can make them straight, jagged, or crisscrossed.
It’s bold, graphic, and super easy to execute.
This is a go-to for “”Easy Halloween Nails”” that still makes a major statement.
7. Spooky Eyeballs
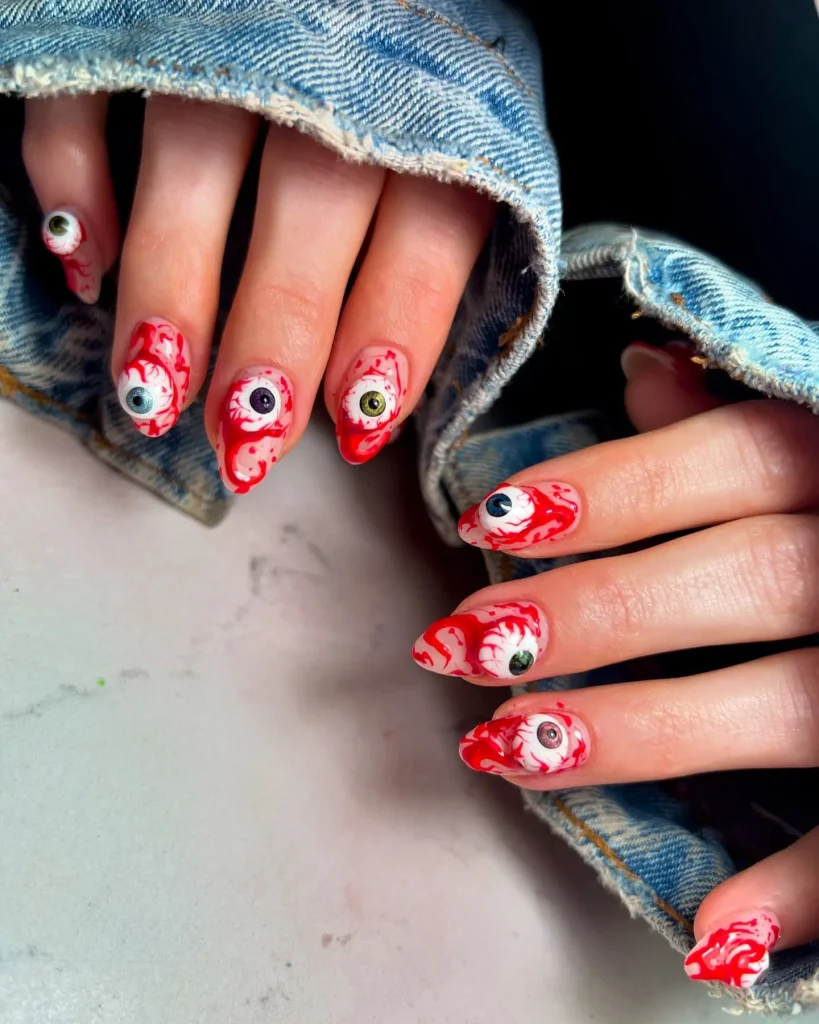
Want a design that’s guaranteed to get a second look?
Eyeballs. Start with a white base. Use a large dotting tool to make a big circle with blue, green, or brown polish.
Then, use a smaller dotting tool to add a black pupil in the center.
For a bloodshot effect, add a few squiggly red lines with a fine brush.
It’s creepy, it’s cool, and it’s surprisingly simple.
Pack this one into your “”DIY Halloween Nails”” playbook for maximum impact.
8. Mummy Dearest Wraps
This design has amazing texture and looks way more complex than it is.
Start with a white or off-white base.
Once it’s almost dry, take a very thin brush with black polish and create thin, overlapping, and slightly messy lines across the nail.
Leave a little space and add two black dots for peeking eyes.
It’s a fun, spooky design that gives the illusion of wrapped mummy bandages without the fuss.
9. Pumpkin Patch Accent
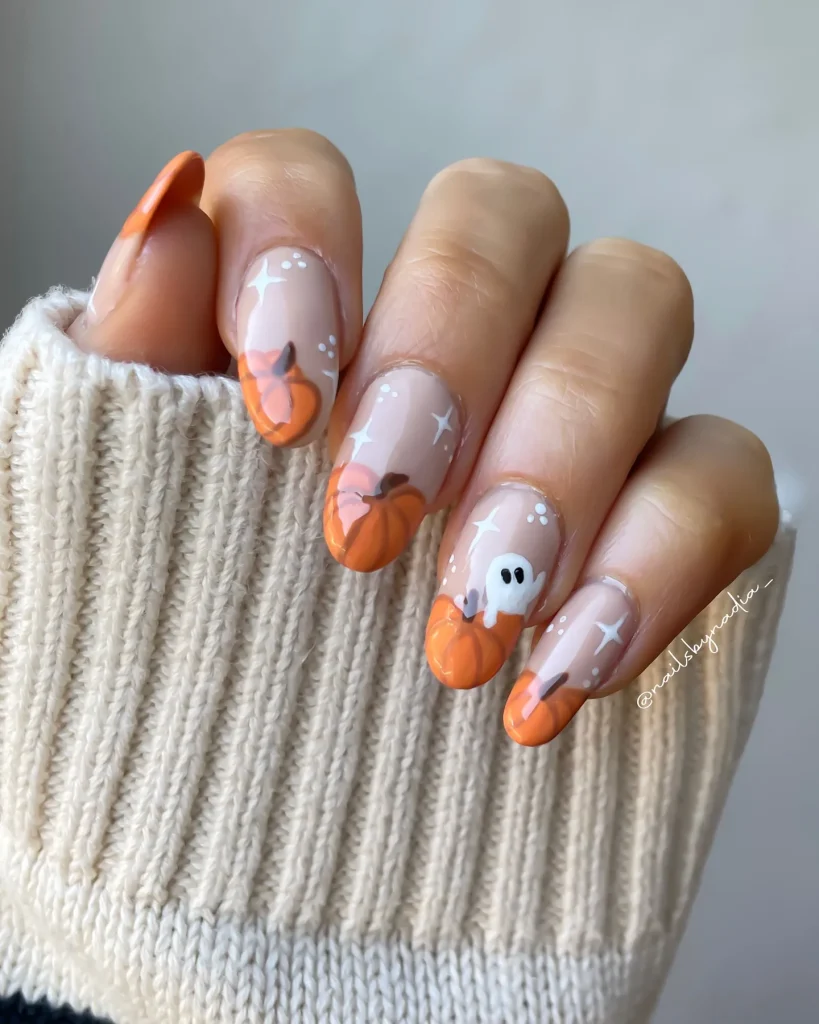
You can’t skip the pumpkins.
But instead of trying to paint a detailed jack-o’-lantern on every finger, focus on one accent nail.
Paint the other nails a solid fall color like maroon, deep green, or black.
On your ring finger, paint a simple orange circle and add a little green stem at the top.
It’s a classy, understated way to rock a classic Halloween symbol.
This approach is perfect for making “”October Nail Ideas”” feel fresh and modern.
10. Glimmering Night Sky & Bats
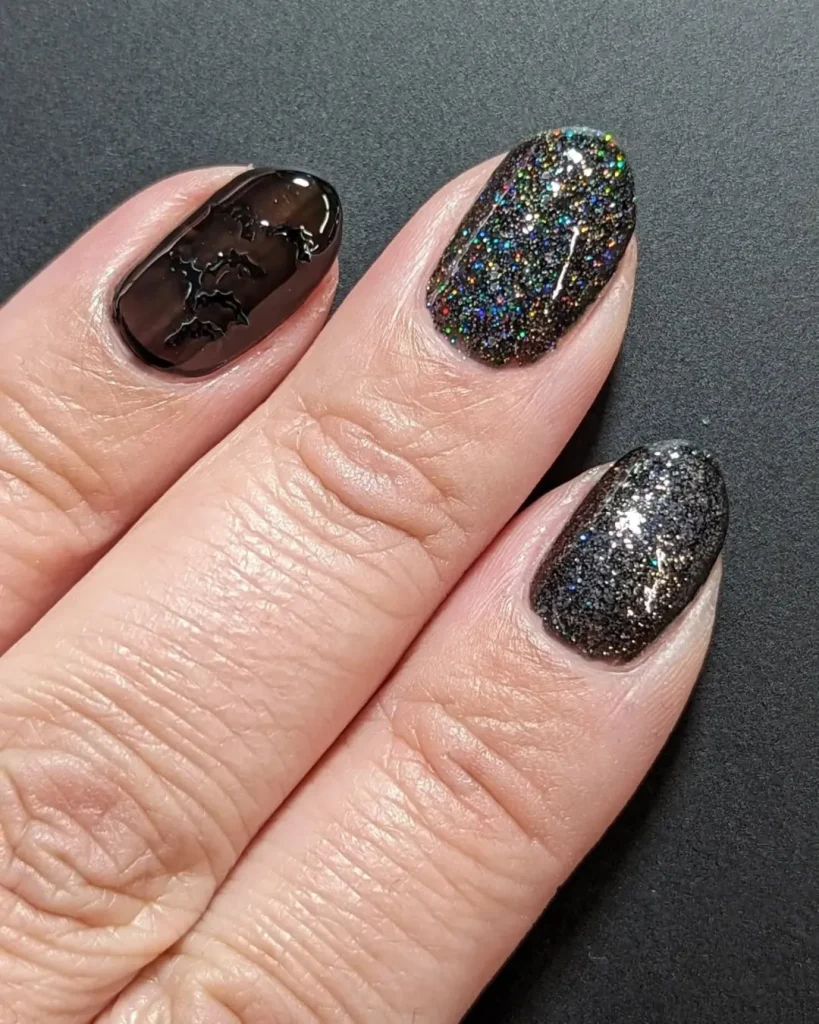
For a touch of witchy elegance, this is your go-to.
Paint your nails with a dark blue or black polish.
While it’s still a bit tacky, dab on some silver glitter polish, concentrating it more at the tips for a subtle gradient.
Once dry, use a tiny brush to paint a few simple bat silhouettes (think a stretched-out ‘M’ shape).
This design is moody, magical, and absolutely gorgeous.
A must-try for fans of “”Gothic Nail Designs””.
Nail Your Tools: The Spooky Season Starter Kit
Okay, the ideas are flowing, but you need the right gear.
You don’t need a pro-level kit, but a few key items will make your “”DIY Halloween Nails”” journey way smoother.
Think of this as your creative arsenal.
A good base coat (non-negotiable for preventing stains!), a glossy top coat (the secret sauce for shine and longevity), and a few core colors: black, white, orange, and red. A dotting tool and a thin striping brush are your best friends for details.
You can find cheap sets online that will totally change your nail art game.
11. Sinister Skeleton Ribs
Ready for something a little more advanced?
A skeleton hand or rib cage on an accent nail is a total showstopper.
On a black base, use a thin white brush.
For a rib cage, paint a vertical line down the center of your nail, then add small, curved lines coming off it.
It’s intricate, seriously spooky, and proves you’ve mastered your “”Halloween Nail Art”” skills.
12. Negative Space Webs
A modern twist on a classic. Instead of painting a web on a color, make the web out of your natural nail.
Use thin nail art tape to create the web shape on your bare nail.
Paint over it with black polish, and while the polish is still wet, carefully remove the tape.
The result is a super sharp, clean design that looks incredibly professional.
This is a high-fashion take on “”Easy Halloween Nails””.
13. Spatter-Paint Blood Effect
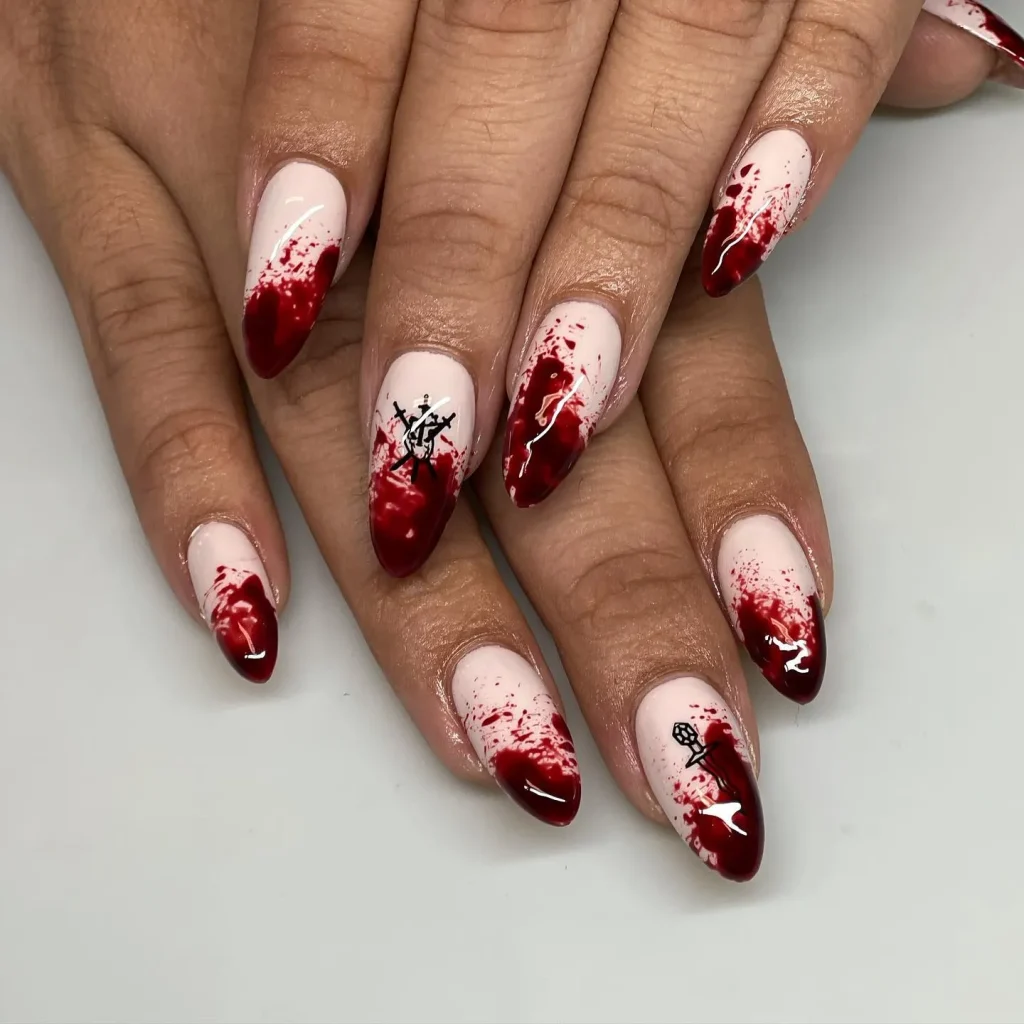
This one is messy but oh-so-effective for a crime scene vibe.
Start with a stark white base. Protect your skin with liquid latex or tape.
Dip a small straw into red polish, aim it at your nail, and blow a short, sharp puff of air.
It creates a realistic spatter effect.
It’s chaotic, it’s gory, and it’s perfect for a zombie or slasher-inspired look.
14. Matte Black Magic
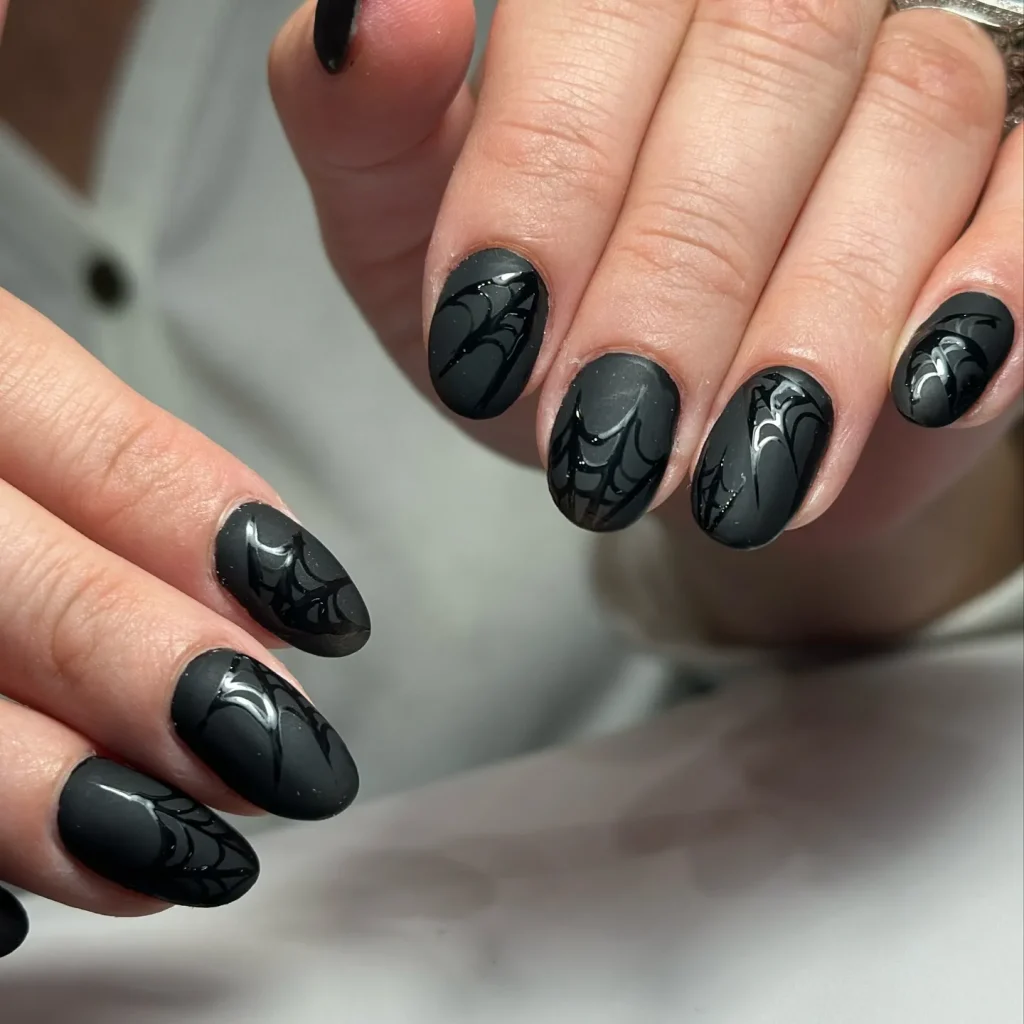
Sometimes, the spooky vibe is all in the texture.
A simple coat of black polish can be instantly elevated with a matte top coat.
It absorbs the light, creating a deep, velvety, and mysterious look.
For a little extra pop, you can paint just the tip with a glossy top coat for a matte/glossy French tip effect.
It’s subtle, sophisticated, and a staple of “”Gothic Nail Designs””.
15. The Gradient Graveyard
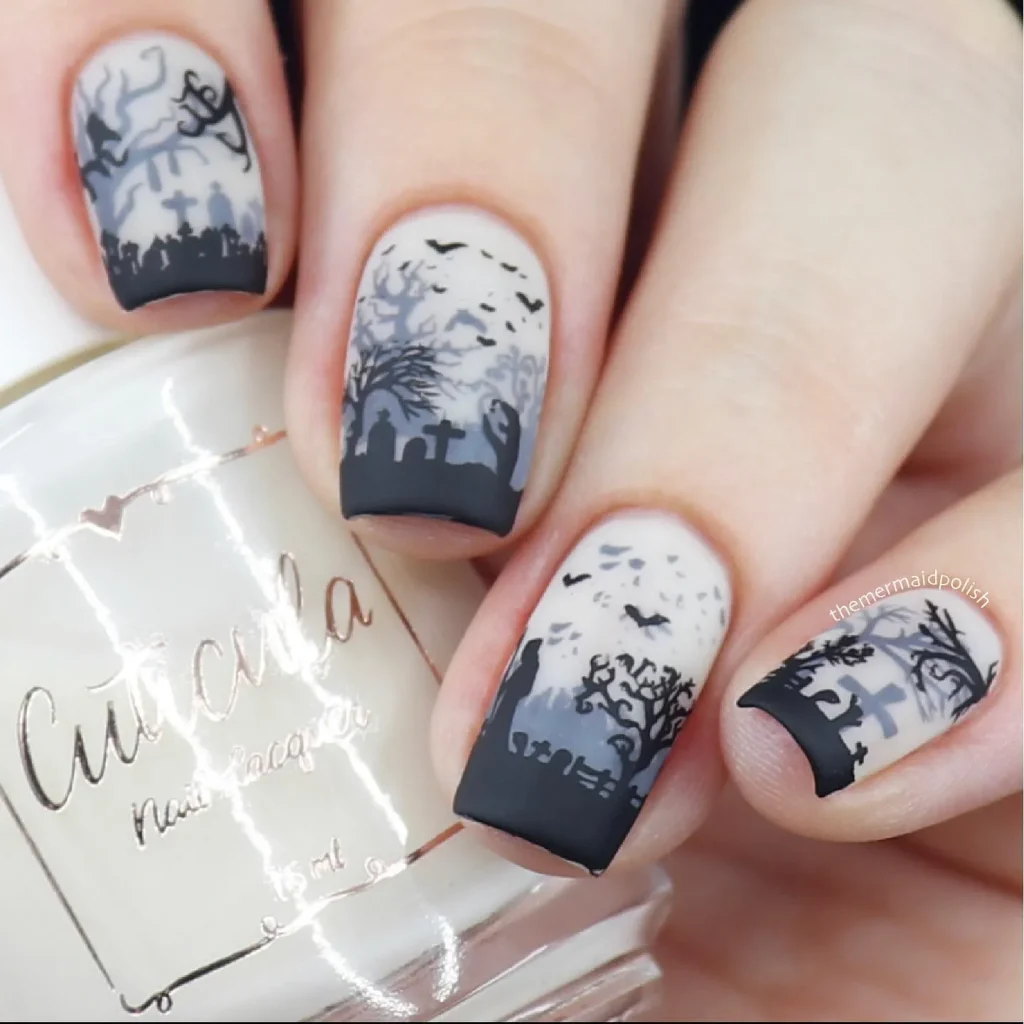
This design sets a whole scene.
Create a gradient on your nail using a sponge with black and grey or dark purple polish.
Once it’s dry, use a thin black brush to paint simple silhouettes at the tip of your nail think tombstones, bare trees, or a creepy fence.
It’s atmospheric, artistic, and tells a whole spooky story on your fingertips.
A perfect finale for your “”Spooky Season Manicure””.
Don’t Let Your Art Chip Before the 31st
You put in the work, now make it last. The secret? Thin coats.
Two or three thin layers of color are way more durable than one thick, goopy one.
Let each coat dry for a few minutes in between.
And that top coat? It’s not a suggestion; it’s a command.
A good, quick-dry top coat seals in your design, adds incredible shine (or a cool matte finish), and protects against chips.
Reapply it every two to three days to keep your masterpiece looking fresh through all the Halloween festivities.
Wrapping It All Up: Your Spookiest Manicure Ever
Okay, take a breath.
You are officially armed and ready to create a Halloween manicure that is not only festive and fun but genuinely cool.
With these 15 ideas, you can go as simple or as extra as your spooky heart desires.
From the Classic Ghost Crew to the Gradient Graveyard, you have options that are perfect for beginners and seasoned DIY-ers alike.
You’re not just painting your nails; you’re setting the mood for the entire month and adding a killer detail to your look.
Now go get your spook on you totally got this.
Don’t be surprised when everyone asks where you got your nails done.